
Five Signs of Ceiling Damage You Should Not Ignore

Drywall Primer vs Sealer: Which Do You Need?
2 octubre, 2026
How to Fix Peeling Drywall Tape for Good
6 octubre, 2026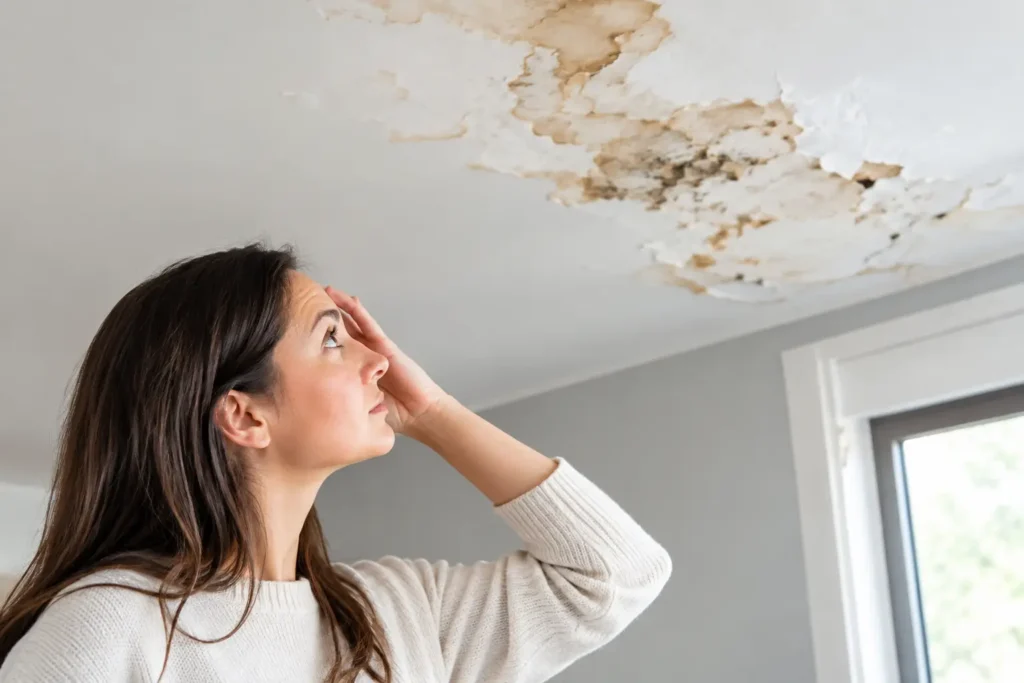
A ceiling can look fine from across the room while a moisture problem, framing shift, or failing drywall joint develops above it. Knowing the five signs of ceiling damage helps you act before a small patch turns into a larger repair, a paint failure, or an unsafe sagging area.
For homeowners, property managers, and contractors, the goal is not to panic at every hairline crack. It is to recognize what the surface is telling you, identify whether the cause is active, and get the right repair completed with a clean finish that is ready for paint.
Five Signs of Ceiling Damage to Watch For
1. Water stains, yellow rings, or dark discoloration
A brown, yellow, or gray stain is one of the clearest signs that water has reached the ceiling material. It may come from a roof leak, plumbing line, bathroom above, HVAC condensation, ice damming, or an older leak that was never properly repaired.
The location can offer a clue, but it does not always identify the source. A stain below a bathroom may point to a plumbing issue, while staining near an exterior wall or chimney could be related to the roof. Water can also travel along framing before it reaches the drywall, so the visible stain may be some distance from the leak.
Do not simply paint over a water stain. First, make sure the moisture source has been corrected and the area is fully dry. Then the damaged drywall can be assessed. If the gypsum core has softened, swelled, or developed mold, replacing the affected section is usually a better long-term solution than covering it.
2. Cracks that keep coming back
Small ceiling cracks can occur as a home settles or seasonal humidity causes materials to expand and contract. A thin, stable crack near a drywall seam may be a cosmetic issue. But a crack that widens, lengthens, branches out, or returns soon after repair deserves closer attention.
Cracks running in straight lines often follow drywall joints. This can happen when joint tape loses adhesion, the original finishing work was insufficient, or movement in the framing stresses the seam. Cracks around corners, light fixtures, or ceiling transitions can also indicate movement that needs to be addressed before refinishing.
The repair depends on the cause. A proper drywall repair may involve removing loose tape, securing the board where necessary, applying new tape, and building the joint with compound in controlled coats. Applying filler over a failing seam may make it look better briefly, but the crack can reappear when the underlying joint moves again.
3. Sagging, bulging, or a soft ceiling surface
A ceiling should sit flat and feel firm. Any visible sag, low spot, bulge, or soft area should be treated as urgent, especially if it is growing. Water is a common cause because wet drywall becomes heavy and loses strength. In severe cases, a water-filled ceiling can collapse without much warning.
Look for paint that appears stretched, a rounded bubble in the ceiling, bowed drywall between fasteners, or a section that feels soft when lightly touched. Do not puncture a sagging ceiling yourself if you are unsure what is above it. Electrical wiring, insulation, or a significant amount of water may be present.
Turn off power to nearby ceiling fixtures if there is active leaking or visible water near electrical components. Then arrange for the water source to be stopped and have the damaged material inspected. A professional can remove compromised drywall safely, confirm the framing has dried, and rebuild the area so the new finish blends into the surrounding ceiling.
4. Peeling paint, bubbling texture, or loose popcorn finish
Paint that peels or bubbles on a ceiling is often blamed on age, but moisture and poor surface preparation are frequent causes. Water vapor from bathrooms, kitchens, or laundry areas can damage paint over time, particularly when ventilation is limited. A previous repair may also fail if it was painted before the joint compound was fully dry or properly primed.
Textured and popcorn ceilings can make the problem harder to read. A loose patch may be caused by moisture, weak adhesion, or impact damage. If the texture is flaking in multiple areas, removing and replacing isolated spots may not provide an even result. Depending on the ceiling condition and the desired look, full texture removal and a smooth finish may be the more practical upgrade.
Before any refinishing, the surface needs to be stable, dry, and clean. That means correcting humidity or leak issues first, removing loose material, repairing the drywall, and preparing the ceiling for a consistent paint finish. A level 4 or level 5 finish can make a major visual difference in rooms with strong natural light or glossy paint.
5. Visible tape lines, joint ridges, or nail pops
Ceiling damage is not always caused by water. Sometimes the issue is a failing drywall finish. If you can see straight tape lines, raised seams, ridges, or small circular bumps where fasteners are pushing through, the ceiling may need professional taping and finishing work.
Nail pops occur when drywall fasteners shift or lose their hold. They can be isolated, or they may appear repeatedly in an area affected by framing movement. Tape lines and ridges are particularly noticeable after painting because overhead lighting casts shadows across even small imperfections.
A clean repair takes more than adding compound over the visible defect. The drywall should be checked for loose fasteners or movement, then the repaired area must be taped, feathered wide, sanded carefully, and matched to the existing texture or smooth finish. This is where skilled finishing matters. A ceiling can be structurally sound yet still look unfinished if seams and patches are not blended correctly.
When Ceiling Damage Needs Immediate Attention
Some damage can wait for a scheduled repair. Active water leaks, sagging drywall, mold-like growth, electrical concerns, and rapidly expanding cracks should not. These issues can affect more than appearance, and waiting may increase the amount of drywall, insulation, or framing work required.
For a rental property or commercial space, document the condition with photos and note when you first noticed it. This helps track whether staining or cracking is spreading and gives the repair team useful information. If a tenant reports a soft or leaking ceiling, treat it as a priority rather than a routine cosmetic request.
It also helps to think about the room above and the conditions around the damage. Was there a recent plumbing repair? Has the roof leaked during heavy rain? Does a bathroom fan vent properly? Was the ceiling recently painted? These details can speed up diagnosis and prevent a new finish from being installed over an unresolved problem.
What a Lasting Ceiling Repair Should Include
The best repair is based on the condition of the drywall, not just the size of the visible mark. In some cases, the work may be limited to retaping a seam and refinishing it. In others, damaged drywall needs to be removed so wet insulation, hidden mold, or weakened material can be addressed first.
Once the cause is under control, the repair should restore both strength and appearance. That usually means securely fastening new or existing drywall, reinforcing joints with tape, applying multiple coats of compound, sanding without creating waves in the surface, and priming before paint. Matching an existing texture requires a different approach than creating a new smooth ceiling, so the right method depends on the room and your finish expectations.
For properties in Niagara Region, St. Catharines, and Hamilton, TH Taping can assess ceiling cracks, water-damaged patches, failed seams, and outdated textures, then provide a clear quote for the work needed. Small repairs deserve the same attention to detail as a full renovation because an obvious ceiling patch can distract from an otherwise well-kept room.
A ceiling problem rarely improves by being ignored. If the surface has changed, protect the area, resolve any active moisture issue, and have the finish evaluated while the repair is still manageable. A properly repaired ceiling should disappear into the room – flat, clean, durable, and ready for the life happening underneath it.