
Ceiling Texture Removal Done Right

How to Compare a Drywall Quote Near Me
26 mayo, 2026
How to Finish Drywall Seams the Right Way
29 mayo, 2026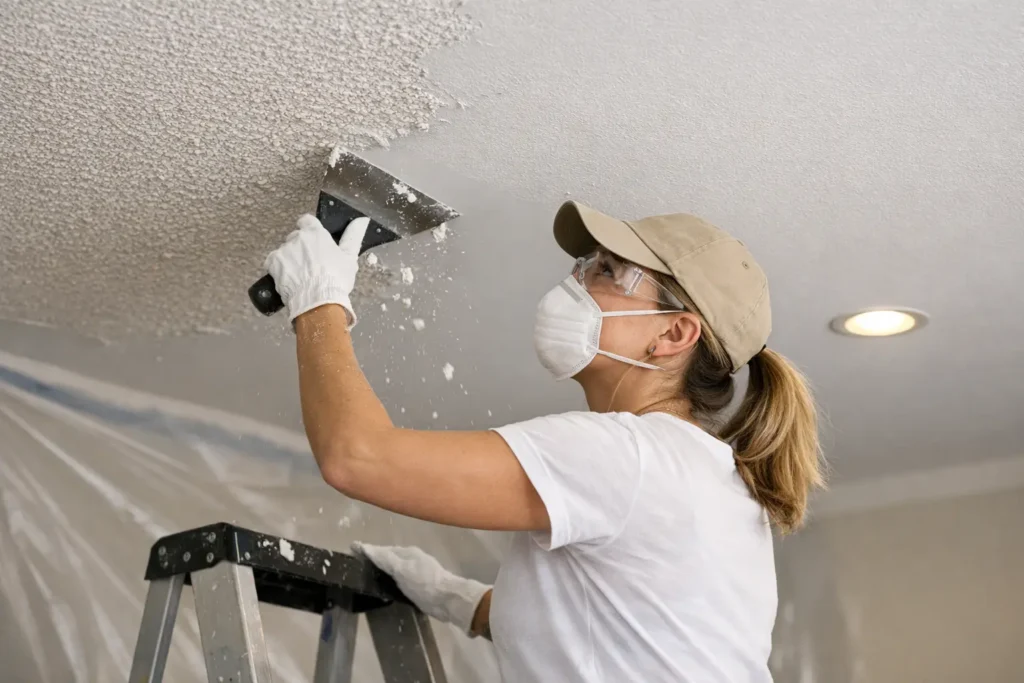
That old textured ceiling usually becomes the most obvious flaw in the room the moment everything else gets updated. Fresh paint, new floors, better lighting – and the ceiling still pulls the space backward. Ceiling texture removal is one of the fastest ways to make an interior feel cleaner, brighter, and more current, but the process only looks simple from the floor.
A textured ceiling can hide minor imperfections, but it also traps dust, dates the room, and makes repairs harder to blend. Once a homeowner, contractor, or property manager decides to remove it, the next question is not whether it can be done. It is how to get a flat, paint-ready finish without trading one problem for another.
Why ceiling texture removal changes a room so much
Ceilings take up a large visual surface, even when people do not notice them right away. Heavy texture breaks up light, creates shadows, and can make a room feel lower than it is. Removing that texture opens the surface and gives the entire space a sharper finish.
This is especially noticeable in renovated kitchens, living rooms, hallways, and commercial interiors where clean lines matter. A smooth ceiling pairs better with modern paint, recessed lighting, and higher-end wall finishes. If the goal is a level 4 or level 5 look, leaving an old textured ceiling overhead usually works against the final result.
There is also a maintenance advantage. Smooth ceilings are easier to patch, repaint, and inspect. Stains, cracks, and small repairs can be handled more predictably when the surface is not covered in a sprayed or stippled pattern.
Not every ceiling texture should be treated the same way
One of the biggest mistakes in ceiling texture removal is assuming every textured ceiling comes off with water and a scraper. Some do. Some do not. The material, the age of the ceiling, the presence of paint, and the condition of the drywall all affect the right approach.
If the texture has never been painted, removal is often more straightforward. Moisture can soften the material enough for controlled scraping. Once the texture has been painted, the surface may resist water and become much harder to remove cleanly. In those cases, scraping can gouge the drywall face paper or leave an uneven substrate that still needs substantial finishing.
There is also the issue of age. Older ceilings may require more caution, especially if the texture predates modern material standards. Testing before disturbing the surface is the responsible first step whenever there is any doubt about what is overhead.
What the process actually involves
Professional ceiling texture removal is less about aggressive scraping and more about surface control. The room needs to be protected properly because this is messy work. Floors, walls, fixtures, vents, and furniture all need attention before removal starts.
Then comes the removal itself, which may involve softening and scraping, dry removal in limited conditions, or partial removal followed by skim coating. The right method depends on how firmly the texture is bonded and whether preserving the drywall underneath is realistic.
Once the texture is off, the real finish work begins. Most ceilings need repair after removal, even if the scraping goes well. Joint lines may show, old patches may appear, screw pops can become visible, and surface damage often needs correction. This is why the job should never be judged only by how fast the texture comes down. The final appearance depends on the finishing stage.
Skim coating is often what makes the ceiling look new
A lot of people think ceiling texture removal ends when the scraping is done. In practice, that is only the halfway point. The clean, smooth look most clients want usually comes from proper skim coating, sanding, and surface preparation after the texture is removed.
This is where craftsmanship matters. A ceiling can be technically free of texture and still look poor under paint if it has waves, ridges, torn paper, or visible joints. A skim coat helps restore uniformity across the surface so the ceiling reflects light evenly instead of exposing every imperfection.
For higher-visibility rooms, especially those with larger windows or direct artificial lighting, a better finish standard makes a real difference. Light reveals defects quickly. What looks acceptable before primer can become obvious once the ceiling is painted flat white.
When removal is better than covering the texture
Sometimes clients ask whether it is easier to cover the texture instead of removing it. The answer depends on the texture profile and the condition of the existing ceiling. A light texture may be buried under skim coats if the surface is stable and well bonded. A heavier or loose texture usually creates more risk.
Covering can save time in some cases, but it can also add weight, reduce ceiling clarity, and leave hidden adhesion problems underneath. If the texture is flaking, patched badly, or inconsistently painted, removal tends to create a more reliable foundation.
There is no one-size-fits-all answer here. The best choice is based on the existing surface, the finish level expected, and how long the result needs to last.
Common problems that show up during ceiling texture removal
Even in straightforward rooms, surprises happen. Water stains can reveal past leaks. Poor taping from earlier work may appear once the texture is gone. Previous repairs may sit proud of the field, and older cracks may reopen when the ceiling is disturbed.
This is why experience matters. Ceiling work is unforgiving because it is overhead and often seen in broad light. A contractor who only removes texture without handling finish correction leaves the hardest part unresolved. A better approach is to treat the ceiling as a full finish system: removal, repair, skim, sanding, and paint preparation.
Another common issue is underestimating cleanup and dust control. Ceiling work affects the whole room, and careless containment can create extra labor long after the texture has been removed. That matters in occupied homes, tenant turnovers, commercial spaces, and renovation schedules where other trades are already lined up.
Is this a DIY job or a professional job?
Some small ceiling texture removal projects can be handled by a capable DIY homeowner, especially in limited spaces with unpainted texture and good access. But many jobs become more complicated once the first section is scraped. The surface underneath may be damaged, uneven, or not ready for paint.
That is where many DIY efforts slow down. Getting texture off is one skill. Delivering a smooth, consistent ceiling across an entire room is another. The difference shows most under final lighting.
For property managers, remodelers, and homeowners trying to protect schedules, hiring a crew that can handle both removal and finishing usually saves time and avoids the patchwork look that happens when multiple steps are split between different people. In service areas like Niagara, St. Catharines, and Hamilton, that kind of one-scope approach is especially helpful when a project needs to move quickly and still look sharp at the end.
What to expect from a quality finished ceiling
A properly completed ceiling should look calm. That may sound simple, but it is the best way to describe a good finish. The surface should feel visually even, with no distracting lines, chatter marks, rough patches, or flashing under paint.
The edges where ceiling meets wall should also look intentional. Clean transitions matter, especially after room updates or repainting. If crown molding is not part of the design, the ceiling line needs to carry itself on finish quality alone.
A good result also lasts. That means repairs were addressed, weak areas were corrected, and the substrate was prepared to hold primer and paint correctly. Quick work can look acceptable for a week. Proper work still looks right months and years later.
Choosing the right contractor for ceiling texture removal
If you are comparing options, look beyond the promise to remove popcorn or scrape texture fast. Ask how the ceiling will be repaired afterward, what finish level is expected, and how the room will be protected during the job. Those answers usually tell you whether the contractor is focused on cleanup and final quality or only on demolition.
This is where a finishing specialist brings real value. The best outcome does not come from removing material alone. It comes from understanding drywall surfaces, patching, skim coating, and how ceilings behave under paint and light. That combination is what turns an outdated overhead surface into one that feels clean, durable, and truly finished.
If your ceiling is making the whole room feel older than it is, removing the texture can be the upgrade that finally brings everything together – provided the work is done with the finish in mind from the very start.






