
How to Finish Drywall Seams the Right Way

Ceiling Texture Removal Done Right
27 mayo, 2026
Drywall Finishing Guide for Smooth Walls
31 mayo, 2026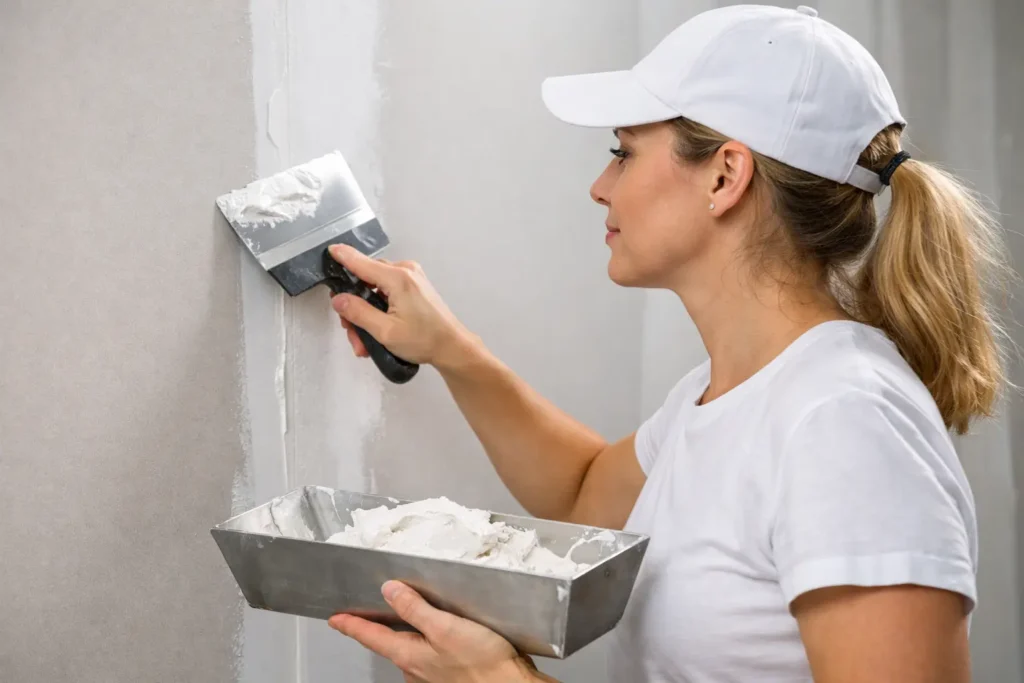
A bad drywall seam shows up fast once the paint goes on. What looked flat during mudding can turn into a visible ridge, a hairline crack, or a joint that catches every bit of side light in the room. If you want to know how to finish drywall seams so the wall looks clean and ready for paint, the process matters just as much as the product.
Good seam finishing is not about piling on more mud. It is about using the right tape, applying compound in controlled coats, and giving each layer enough time to set before the next one goes on. That is what creates a surface that looks smooth, holds up over time, and does not need to be fixed again after painting.
What a finished drywall seam should look like
A properly finished seam should disappear into the wall. You should not see a raised line, a hollow spot, or flashing where the joint reflects light differently from the surrounding surface. The goal is not just to cover the gap between sheets. The goal is to feather the area wide enough that the eye cannot detect where the joint starts and stops.
This is where many DIY jobs go wrong. People focus on filling the seam itself, but the real finish happens in the edges. If the compound is not spread and tapered correctly, the seam may be structurally covered but still visually obvious.
How to finish drywall seams step by step
Start with a solid installation
Before any tape or mud goes on, the drywall needs to be hung correctly. Loose panels, misaligned edges, and proud fasteners will create problems that joint compound cannot truly fix. Screws should sit slightly below the surface without breaking the paper, and the boards should meet cleanly.
If the seam has a large gap, pre-fill it before taping. A small gap is manageable, but a wide one can shrink, crack, or sink as the compound dries. Taking care of that early saves time later.
Choose the right tape
Paper tape and fiberglass mesh tape both have their place, but they behave differently. Paper tape is still the standard for many professionals because it creates a strong joint and works especially well in inside corners. It also lays flatter, which helps when the final finish needs to be as clean as possible.
Mesh tape is faster for some repairs because it sticks in place on its own, but it usually needs setting-type compound for the first coat to reduce the chance of cracking. For standard seams on new drywall, paper tape is often the better choice if appearance is the priority.
Use the first coat to embed the tape, not build the seam
The first coat should be thin and controlled. Apply a layer of joint compound over the seam, press the tape into it, and then smooth it with a taping knife so excess mud comes out from behind the tape. What stays behind should be enough to bond the tape without leaving a heavy buildup.
This is the point where patience matters. If too much compound stays under the tape, the seam becomes bulky. If too little stays under it, the tape can blister or fail to bond. A clean first pass sets up the rest of the finish.
Let the joint dry fully before the second coat
Drywall finishing is one of those jobs where rushing usually creates more work. If the first coat is still damp, the next coat can drag the tape, soften the bond, or trap moisture that leads to slow curing and shrinkage.
Drying time depends on temperature, humidity, and airflow. In a dry, controlled space, it may be ready the next day. In more humid conditions, it can take longer. The joint should feel dry and firm before you move on.
Build the seam in light, wider coats
The second coat is where the seam starts to disappear
The second coat should extend wider than the first. This is how you begin feathering the joint into the face of the board. Instead of making the center thicker, you are easing the transition outward so the surface reads as flat.
Keep your knife angle consistent and pressure heavier at the outer edges. That helps leave more compound in the center and less on the sides, which creates a natural taper. A common mistake here is applying the coat too narrow. Even a smooth seam can look obvious if it does not spread wide enough.
The third coat refines the surface
Not every seam needs a heavy third coat, but most good finishes benefit from a final skim that widens the feather and removes minor imperfections. This coat is about refinement, not repair. It should be light, smooth, and broad enough to blend the joint into the wall.
But there is a trade-off. More mud does not always mean a better seam. If earlier coats were applied too heavily, a third coat can end up chasing the problem instead of improving it. In that case, scraping high spots before recoating is usually better than burying them.
Sanding without damaging the finish
Sanding should correct the surface, not reshape the whole seam. If you find yourself aggressively sanding to flatten ridges, the compound was likely applied too heavily or unevenly. Good finishing work keeps sanding light.
Use a fine sanding sponge or fine-grit paper and focus on edges, tool marks, and small imperfections. Be careful not to scuff the drywall face paper or expose the tape. Once the tape is visible, the seam often needs another coat.
Dust control matters too. Drywall dust gets everywhere, and it can interfere with primer and paint if it is not cleaned off properly. After sanding, wipe or vacuum the surface so the wall is actually ready for the next step.
Inside corners, butt joints, and other tricky areas
Inside corners need a different touch
Corners are less forgiving than flat seams because both planes have to look straight and clean. Paper tape works best here because it folds neatly and creates a crisp line. Apply compound to both sides, crease the tape, press it into the corner, and remove excess mud carefully.
After it dries, coat one side at a time if needed. That keeps the corner shape from getting disturbed. Trying to finish both sides too heavily at once often leads to a rounded, messy corner.
Butt joints usually need extra feathering
Factory edges are recessed, which gives tape and compound a place to sit. Butt joints are different because two cut ends meet on a flat plane with no recess. That means the seam naturally builds outward and can show more easily.
To hide a butt joint well, widen your coats more than you would on a tapered seam. This is one of the clearest examples of why drywall finishing depends on the joint type, not just the basic steps.
When primer reveals problems
Many seams look fine until primer goes on. Primer tends to highlight ridges, shallow sanding lines, pitted spots, and uneven texture. That does not always mean the whole job failed, but it does mean the surface was not fully finished.
A small touch-up coat after priming is common, especially in rooms with strong natural light or smooth paint finishes. High-end results often come from that extra correction step. For premium walls and ceilings, especially when a Level 5 finish is expected, surface uniformity matters just as much as the joints themselves.
Common mistakes that make seams show
The most common seam problems come from too much compound, not enough feathering, poor drying time, or the wrong tape-compound combination. Over-sanding is another big one. It can fuzz the paper, expose tape, and create a patchy surface that flashes under paint.
Lighting also changes what is acceptable. A seam that passes in a low-light basement may stand out badly in a living room with large windows or overhead lighting washing across the wall. That is why professional drywall finishing is often about reading the room, not just following a basic sequence.
When it makes sense to call a pro
If the project includes large ceilings, long butt joints, repeated cracking, or a finish level that has to look sharp under paint, hiring a specialist can save time and frustration. Drywall seams are simple in theory, but a clean final result depends on consistency, timing, and technique across the entire surface.
At TH Taping, that is the standard we work toward on every repair, renovation, and new finish job. Whether it is a small patch or a full interior, the goal stays the same – smooth, durable results that look right once the paint is on.
If you are finishing drywall seams yourself, work in thin coats, stay patient between steps, and judge the wall in real lighting before calling it done. The best seam is the one nobody notices when they walk into the room.






