
Drywall Repair After Plumbing Leak

Commercial Drywall Finishing That Holds Up
24 mayo, 2026
How to Compare a Drywall Quote Near Me
26 mayo, 2026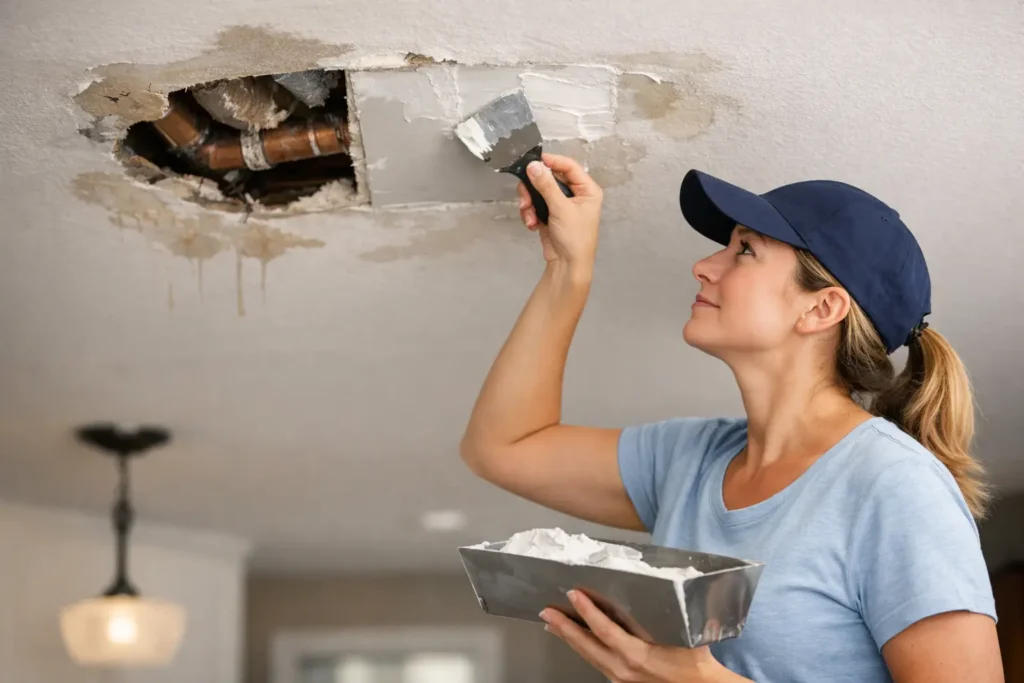
A plumbing leak rarely stops at the pipe. By the time you notice the stain on the ceiling or the soft spot in the wall, moisture has usually spread farther than it looks. That is why drywall repair after plumbing leak damage is not just about patching a visible hole. It is about making sure the area is dry, stable, clean, and ready for a finish that does not keep showing the problem later.
If the leak came from an upstairs bathroom, a supply line, or a drain inside the wall, the first question is not how fast you can mud over it. The first question is whether the water source has been fully fixed. Until that happens, any repair is temporary. A clean finish only lasts when the cause of the damage is gone.
What plumbing leaks do to drywall
Drywall handles normal indoor humidity well, but direct water exposure changes everything. The paper facing can bubble, wrinkle, or separate. The gypsum core can soften and lose strength. In ceilings, that often shows up as sagging, staining, or cracked joint lines. In walls, you may see swelling at the baseboard, soft corners, nail pops, or tape lifting at the seams.
Not every leak creates the same kind of damage. A one-time supply line break can leave a dramatic wet area that dries out cleanly if addressed quickly. A slow leak behind a vanity or inside a ceiling cavity is different. That kind of moisture can sit for days or weeks, affecting insulation, framing, and the backside of the drywall long before the surface looks bad.
That is where people get caught. The visible stain might be small, but the damaged section often extends beyond it.
Drywall repair after plumbing leak damage starts with drying
Before any patching or finishing begins, the area needs to be dry all the way through, not just dry to the touch. This matters because trapped moisture can lead to recurring stains, tape failure, soft edges around the patch, and in some cases mold growth.
For minor incidents, drying may be straightforward. If the leak was caught quickly and the drywall is still solid, airflow and dehumidification may be enough. For more serious leaks, sections of drywall usually need to be opened so the cavity can dry properly. That can feel aggressive, but it is often the cleaner and more cost-effective path. Leaving wet material in place usually creates a second repair later.
Ceilings deserve extra caution. Water can pool above the surface and weaken a larger area than expected. If a ceiling is bulging, sagging, or actively dripping, it should be evaluated carefully before anyone starts cutting or sanding below it.
When drywall can be saved and when it should be replaced
This is the part homeowners and property managers usually want answered right away. Can the drywall stay, or does it need to come out?
If the board is still firm, the paper face is intact, and the leak was limited and corrected quickly, localized repair may be possible. Stain-blocking primer and finish work can restore the surface once everything is dry. That approach works best when the moisture exposure was brief and the drywall did not lose its shape or strength.
Replacement is the better option when the drywall has become soft, swollen, crumbly, or misshapen. The same goes for ceiling sections that sag, taped joints that have released, or walls that have absorbed water for an extended period. If insulation behind the wall is wet, opening the area is usually necessary anyway.
There is also a practical finish question. Even if a damaged section can technically stay in place, it may not be the best choice if the goal is a smooth, invisible repair. On high-visibility surfaces, especially around natural light or flat paint, replacement and proper refinishing often produce a better final result.
The real challenge is matching the finish
Many leak repairs fail visually long after they succeed structurally. The wall is dry, the patch is solid, but the repaired area flashes under paint, shows a ridge at the seam, or has a texture mismatch on the ceiling. That is usually not a plumbing issue anymore. It is a finishing issue.
Professional drywall repair after plumbing leak damage depends on how well the new work blends into the surrounding surface. That includes clean cuts, solid backing, proper board thickness, careful taping, smooth compound application, sanding control, and the right primer before paint. If the original wall had a higher-end finish, the repair has to meet that standard too.
Ceilings can be even less forgiving. A patch overhead catches light differently, and uneven feathering becomes obvious fast. If the leak damage crosses multiple seams or affects a broad area, a spot repair may technically work but still look patched. In those cases, widening the repair area can actually create a cleaner final appearance.
Why ceiling leaks often need a more careful approach
Ceiling drywall repairs after plumbing leaks tend to be more complex than wall repairs for one simple reason. Gravity works against the material and against the finish.
Once ceiling board gets saturated, it may lose strength even if the visible surface looks acceptable after drying. Fasteners can loosen. Tape joints can crack. The paper can stretch slightly, which creates a subtle wave that becomes obvious after repainting. A repair that looks fine at first glance may still stand out once daylight hits it.
There is also the issue of access. The leak may have traveled from a bathroom fixture, an HVAC line, or a pipe run several feet away from the stain. That means the damaged opening is sometimes not directly under the source. Good repair work accounts for both the plumbing path and the finish path.
For smooth ceilings, consistency matters. Even a small patch can look obvious if the surrounding surface is level 4 or level 5 quality and the repair is handled like a basic utility patch.
What a proper repair process usually looks like
A good repair moves in a clear sequence. The leak is fixed first. The damaged area is assessed and opened as needed. Wet material is removed if it cannot be saved. The cavity dries fully. New drywall is installed where necessary, then taped, finished, sanded, and primed so the surface is ready for paint.
That sounds simple on paper, but the quality lives in the details. Cuts need to be made cleanly and to stable framing or proper backing. Replacement board has to sit flush with the existing plane. Joint compound needs enough drying time between coats. Rushing any of that usually shows up in the final finish.
This is especially true in occupied homes, commercial interiors, and active renovation sites where speed matters. Fast response is valuable, but speed should not come at the expense of drying time or finish quality. The best repair is the one that solves the issue once and leaves the surface looking right.
Small leak patch or larger restoration?
It depends on the size of the affected area, how long the leak lasted, and how visible the repair will be.
A compact patch may be enough for a localized pipe opening or a small cutout made by the plumber. That is common when access was needed to repair a valve, drain, or line inside the wall. In those cases, the drywall work is mostly about restoring the opening cleanly and blending the finish.
A larger restoration makes more sense when staining spreads across seams, when ceilings have softened, or when multiple sections were opened for drying and plumbing access. Property managers and contractors usually appreciate this distinction because it affects both scheduling and expectations. A small patch is not the same project as rebuilding and refinishing a broad ceiling section after water migration.
Why professional finishing makes the difference
After a leak, most people want the damage gone. What they really want is for the room to look normal again. That takes more than closing the hole.
A professional finisher pays attention to line, flatness, edge build-up, and how the repaired surface will read after primer and paint. That is where many handyman-style repairs fall short. They may close the opening, but they leave visible transitions, rough sanding, or uneven texture that keeps drawing the eye back to the old leak.
For homeowners, that means a repair that does not keep reminding you there was a problem. For contractors and property managers, it means work that is ready for turnover without callbacks over appearance.
TH Taping handles these repairs with that end result in mind – dry, solid surfaces and a finish that looks clean, consistent, and ready for paint.
If you are dealing with leak damage now
Do not judge the repair by the stain alone. Make sure the plumbing issue is fixed, the area is properly dried, and the drywall is evaluated for both structural condition and finish quality. Sometimes that leads to a simple patch. Sometimes the smarter move is replacing more material so the final result looks better and lasts longer.
When drywall repair after plumbing leak damage is done correctly, the goal is not just to cover the damage. It is to restore the wall or ceiling so it feels finished, dependable, and visually clean again.






