
Drywall Finishing Before Painting Done Right

Smooth Ceiling Finish: Is It Worth It?
20 mayo, 2026
Drywall Taping Services That Look Right
22 mayo, 2026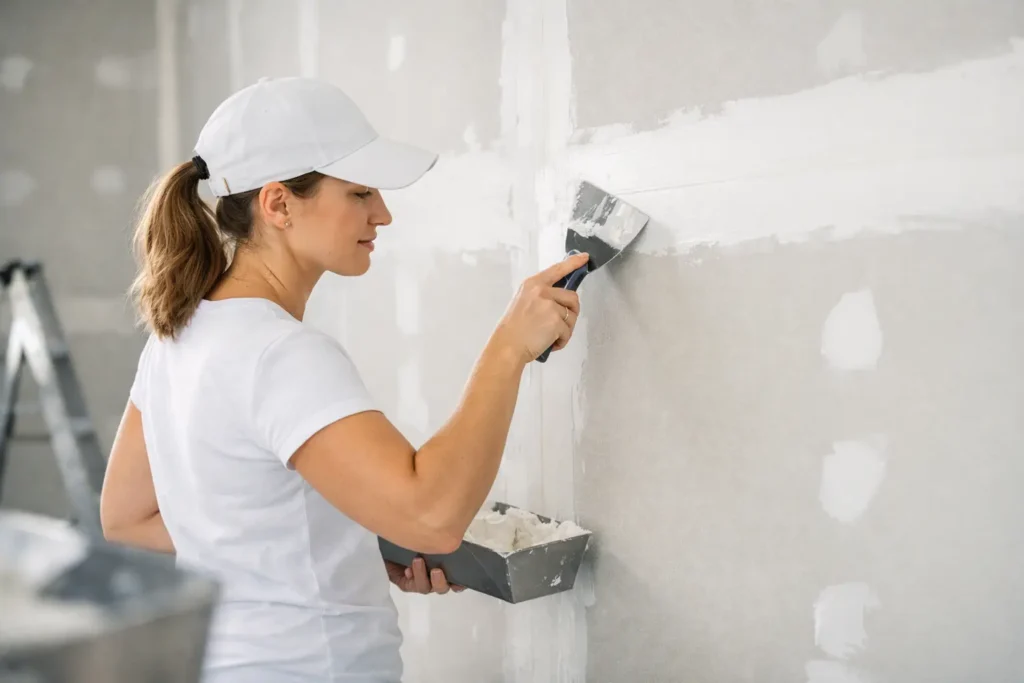
Fresh paint does not hide bad drywall work. It usually does the opposite – it highlights every seam, ridge, dent, and sanding mark once light hits the wall. That is why drywall finishing before painting matters so much. If the surface is not properly taped, coated, sanded, and checked, even expensive paint will leave the room looking unfinished.
For homeowners, property managers, and contractors, this step is where appearance and durability are won or lost. A clean paint job starts long before the first coat goes on. It starts with a wall or ceiling that is flat, consistent, and ready to receive primer and paint without surprises.
Why drywall finishing before painting matters
Drywall finishing is more than covering seams. It is the process of creating a uniform surface across joints, fastener spots, corners, repairs, and transitions. When this work is rushed, the problems show up fast. You may see joint lines through the paint, flashing between patched and unpatched areas, rough texture changes, or visible screw heads.
The issue gets worse with darker paint colors, satin or semi-gloss finishes, and strong natural or artificial lighting. A wall can look acceptable in unfinished light, then suddenly show every imperfection once primed and painted. That is why proper finishing is not cosmetic extra work. It is the foundation for the final result.
This is also where expectations need to match the space. A storage room, utility area, retail space, and formal living room do not always require the same finish level. In some projects, a Level 4 finish is enough. In others, especially where smooth ceilings, large windows, or premium paint are involved, Level 5 is the better choice.
What proper drywall finishing includes
A paint-ready drywall surface should look continuous, not patched together. That takes several steps, and each one affects the final appearance.
Taping and joint treatment
Seams between drywall sheets need tape embedded correctly in joint compound. If tape is poorly set, too thin, or bubbling, the seam can crack or remain visible after paint. Inside corners and outside corners need the same attention. Corners that are uneven or rough draw the eye immediately once the room is finished.
Multiple coats of compound
One coat is not a finish. Drywall joints and fastener depressions need to be built out gradually so they blend into the field of the board. The goal is not to pile mud on the wall. The goal is to feather the compound wide enough that the transition disappears.
This is where many DIY or rushed jobs fall short. The seam may be technically covered, but still raised, narrow, or obvious under paint.
Sanding without damaging the surface
Sanding should remove ridges and tool marks without scuffing the face paper or leaving swirl marks. Over-sanding can create its own problems, especially around seams and corners. Under-sanding leaves rough areas that primer and paint will not magically level out.
A good finish feels smooth and consistent to both the eye and the hand. That consistency is what helps paint lay down evenly.
Repairing flaws before primer
Small dents, edge damage, nail pops, and minor patches should be handled before any primer goes on. Once primer is applied, surface defects often become easier to see. That can be helpful for final inspection, but obvious damage should not be left until the last minute.
Level 4 vs. Level 5 before paint
Not every project needs the same finish level, but every project should have the right one.
When Level 4 works
Level 4 is a standard finish for many residential and commercial interiors. It includes properly taped joints, multiple coats of compound, sanded smooth surfaces, and filled fastener heads. In spaces with flat paint and normal lighting conditions, it often performs well.
For many bedrooms, hallways, offices, and standard wall areas, Level 4 is a practical choice. It gives a clean result when the framing is sound and the painting system is appropriate.
When Level 5 is worth it
Level 5 adds a skim coat or equivalent surfacing treatment across the entire drywall surface. This helps reduce texture differences between the face paper and the finished joints. It is especially useful on ceilings, large open walls, and areas with critical lighting.
If the room has big windows, angled sunlight, glossy finishes, or a premium design standard, Level 5 usually pays off. It does cost more and takes more labor, but it helps avoid the kind of visible joint shadowing and flashing that can ruin an otherwise high-end space.
This is one of those decisions where cheaping out early often costs more later. Repainting does not fix a finish level problem.
Common problems that should be fixed before painting
A wall may seem ready until someone checks it under the right light. Before painting, several issues should be corrected if you want a professional result.
Nail or screw pops should be reset and refinished. Hairline cracks at seams or corners need to be addressed, not painted over. Uneven patches should be floated out farther so they disappear into the surface. Sanding scratches and lap marks need smoothing. Dust should be fully removed, because leftover dust can affect primer adhesion and leave a gritty finish.
Ceilings deserve extra attention. They often reveal defects faster than walls, especially with smooth finishes. Popcorn ceiling removal, patching, or converting to a smooth ceiling requires careful finishing work or the surface will show every transition line overhead.
The role of primer after drywall finishing before painting
Primer is not a substitute for finishing. It is the next step after finishing is done correctly.
New drywall and joint compound absorb paint differently. Primer helps create a more uniform surface so the topcoat covers evenly and cures properly. Without primer, you may get flashing, uneven sheen, and inconsistent color. On patched walls, this difference can be even more obvious.
A quality drywall primer also helps reveal any final imperfections that need touch-up before finish paint. That said, primer should confirm readiness, not expose major unfinished work. If seams, patches, or rough spots are still obvious after primer, the drywall finishing was not complete.
Why rushed prep leads to expensive repainting
The fastest way to delay a project is to paint too soon. Once a finished color is on the wall, every defect becomes more noticeable and more expensive to fix. At that point, correction usually means more sanding, more patching, spot priming, and repainting. In occupied homes or active commercial spaces, that also means more disruption.
This is especially frustrating on renovation projects with tight schedules. Everyone wants the room done, but finishing and drying time still matter. Joint compound needs time to cure between coats. Repairs need proper blending. Dust needs to be controlled. Skipping these steps may save a day up front and cost several days later.
For contractors and property managers, this affects more than appearance. It affects punch lists, tenant turnover, client satisfaction, and callbacks. For homeowners, it affects whether the room feels complete or always looks slightly off.
When to bring in a drywall finishing specialist
Some drywall prep is straightforward. Small touch-ups and simple patching can be manageable when the damage is minor and the finish expectations are modest. But larger repairs, skim coating, ceiling work, and high-visibility surfaces usually benefit from a specialist.
That is particularly true when the project includes smooth ceilings, major patch blending, Level 5 finishing, or emergency drywall repair that needs to disappear once painted. A professional finisher knows how to build out seams correctly, match surrounding surfaces, and identify issues before the painter arrives.
For clients in places like Niagara, St. Catharines, and Hamilton, that can make a real difference on both residential and commercial jobs where appearance matters and downtime needs to stay low. TH Taping is built around that kind of work – precise finishing, dependable service, and surfaces that are actually ready for paint.
What to check before the painter starts
Before paint begins, walk the space with the lights on and, if possible, with some side lighting across the wall. Look along seams rather than straight at them. Check corners, ceiling lines, patch areas, and around outlets and trim transitions.
Run your hand lightly over repaired sections. If they feel raised, scratched, or rough, they will likely show after paint. Make sure dust is removed and the surface is dry, stable, and primed as needed. If you are already noticing flaws before paint, they will not disappear under two coats.
A well-finished drywall surface should not call attention to itself. That is the standard. Paint should add color and protection, not try to hide unfinished prep work.
The best-looking paint jobs usually have one thing in common: the wall was ready for them long before the brush or sprayer came out.






