
Level 4 vs Level 5 Finish Explained

7 Best Ceiling Options After Popcorn Removal
18 junio, 2026
How Long Does Drywall Mud Take to Dry?
22 junio, 2026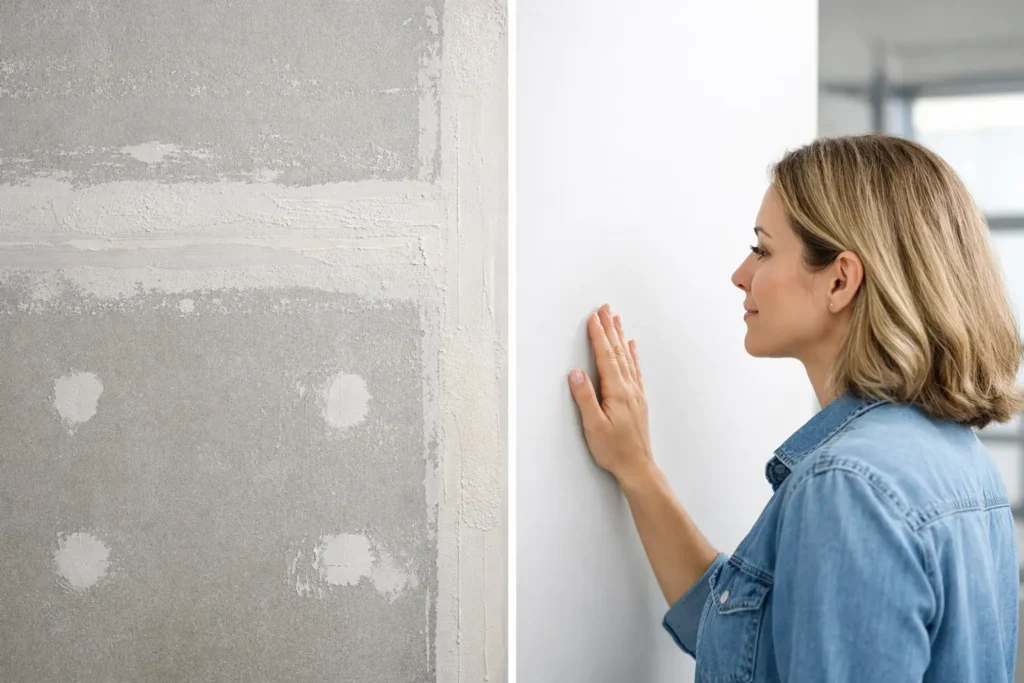
A wall can look perfectly fine at first glance, then show every joint, patch, and roller mark the moment sunlight hits it from the side. That is usually where the conversation around level 4 vs level 5 finish starts. If you are planning new drywall, repairs, or a full renovation, choosing the right finish level affects how clean the final paint job looks and how much prep your surfaces really need.
For homeowners, builders, and property managers, this choice is not about technical jargon. It is about appearance, budget, and expectations. A level 4 finish is a strong standard for many interior spaces. A level 5 finish goes further and is designed to reduce visible surface irregularities under demanding lighting and smooth paint conditions. The right option depends on the room, the light, and the final look you want.
What level 4 and level 5 actually mean
A level 4 finish is the common standard for drywall in many residential and commercial interiors. The joints are taped, covered with multiple coats of compound, and sanded smooth enough for most paints and wall coverings. It delivers a clean, professional surface when the framing is good and the lighting is forgiving.
A level 5 finish includes everything in level 4, plus a thin skim coat or specialty surfacing treatment across the entire drywall face. That extra step helps even out porosity and surface texture from one area to another. Instead of only treating seams and fasteners, the whole wall or ceiling gets a more uniform finish.
This is why level 5 is often specified in high-end spaces, open areas with large windows, and ceilings that will be painted with flat or low-sheen paint. It is not magic, and it does not fix poor framing or rushed installation. What it does is raise the quality of the final surface and reduce the chance that joints and slight imperfections will telegraph through the paint.
Level 4 vs level 5 finish: the real difference
On paper, the difference sounds small. In practice, it can be very noticeable.
With level 4, the finishing work is concentrated on the taped joints, corners, and fasteners. The field of the drywall board is left as manufactured, then primed and painted. In many rooms, that is more than enough. Bedrooms, hallways, offices, and standard living areas often perform well with level 4 when lighting is controlled and the paint choice is reasonable.
With level 5, the entire surface is treated so the wall reads more consistently from edge to edge. This matters most when light rakes across the wall or ceiling. Large windows, modern lighting layouts, long corridors, and expansive open-concept rooms tend to expose even minor variations. The skim coat helps reduce that effect.
The key word is reduce. No drywall finish makes a wall literally perfect under every light at every angle. Good finishing improves the result, but substrate conditions, framing alignment, paint sheen, and lighting design all still matter.
When level 4 is the right choice
Level 4 is often the practical choice when the space does not have harsh side lighting and the project needs a clean result without adding unnecessary cost. It works well for many standard painted walls, especially when the paint has a moderate sheen and the room is not designed to spotlight every surface.
It is also a smart option for rental turnovers, basement finishes, secondary rooms, and many commercial areas where durability and appearance both matter, but premium wall perfection is not the main goal. If the drywall is installed correctly and finished with care, level 4 can look excellent.
This is where experience matters. A rushed level 4 can still leave visible banding, flashing, or poor transitions. A properly executed level 4, on the other hand, gives a smooth, paint-ready surface that satisfies most projects. The finish level is only part of the story. The workmanship behind it is what people end up seeing.
When level 5 is worth the extra step
Level 5 earns its value in spaces where the finish has to hold up visually under tougher conditions. If you have tall walls, long ceilings, oversized windows, recessed lighting, or a design that relies on smooth painted surfaces, level 5 is usually the safer choice.
It is also worth considering in luxury homes, custom builds, renovated kitchens, retail interiors, lobbies, boardrooms, and any room where clients or guests will notice finish quality right away. Smooth ceilings are another common reason to step up to level 5. Ceilings tend to reveal imperfections fast, especially after popcorn ceiling removal or in rooms with natural light washing across the surface.
There is also a paint factor. Dark colors and higher-sheen paints tend to show more flaws. If the design calls for those finishes, level 5 helps create a more even base. It does not replace proper priming and painting, but it gives the painter a better surface to work with.
Cost, time, and expectations
One of the most common questions is whether level 5 is always worth the added cost. The honest answer is no. Sometimes it is necessary, and sometimes it is more than the room needs.
Level 5 takes more labor, more material, and more attention during sanding and surface preparation. That affects scheduling and price. If the area is a spare room with standard lighting and average paint, level 4 may be the sensible move. If the room is the main living area with a wall of windows and a smooth ceiling, the added cost of level 5 may save disappointment later.
It is better to make that decision before painting than after the room is finished and flaws become obvious. Once the lighting and paint expose inconsistencies, fixing them is usually more disruptive and more expensive than doing the finish correctly from the start.
The lighting test most people miss
If you want a quick way to judge whether level 5 should be on the table, look at the room during the brightest part of the day. Stand to the side of the wall and see how light travels across it. Then look up at the ceiling when fixtures are on.
If the surface will be viewed under direct side light, long runs of sunlight, or strong fixture wash, level 4 may still work, but the margin for visible imperfections gets smaller. That is where level 5 makes the most sense.
This is especially relevant in many renovated homes across Hamilton, St. Catharines, and the Niagara Region, where open layouts, larger windows, and smooth modern ceilings are increasingly common. Older surfaces being updated to a cleaner, more contemporary look often benefit from a higher finishing standard.
Why workmanship matters more than labels
A finish level is not a shortcut around poor installation. If the framing is uneven, boards are poorly hung, corners are off, or repairs are patched carelessly, simply calling for level 5 will not solve the root problem. The finish has to be built on solid prep.
That is why a professional drywall finisher looks at the whole surface, not just the specification. Joints, butt seams, corner beads, previous damage, patched areas, and ceiling conditions all affect the final appearance. The best results come from matching the finish level to the project while handling the prep work with precision.
At TH Taping, that practical approach is part of the job. Some projects truly need level 5. Others need a very well-executed level 4 and honest guidance instead of upselling. The goal is the same either way – a clean, durable surface that looks right once the paint goes on.
How to choose between level 4 and level 5 finish
Start with three questions. What will the lighting be like, what paint finish are you using, and how critical is the final appearance? If the room has ordinary lighting and you want a solid professional result, level 4 is often enough. If the space has demanding light, smooth ceilings, dark paint, or a premium design standard, level 5 is usually the better investment.
It also helps to think about where people will focus. A back office, utility room, or standard bedroom may not justify the added step. A front entry, kitchen ceiling, main hallway, or commercial area clients see every day often does.
The best choice is the one that fits the room, not the one that sounds more impressive on paper. Good drywall finishing is about getting the surface right for the way the space will actually be used and seen.
If you are unsure, ask for an assessment based on the specific room, not just a generic price. A clear recommendation early on can save you time, money, and frustration once the paint is up and the light tells the truth.






