
How Long Does Drywall Mud Take to Dry?

Level 4 vs Level 5 Finish Explained
20 junio, 2026
How Long Does Drywall Finishing Take?
24 junio, 2026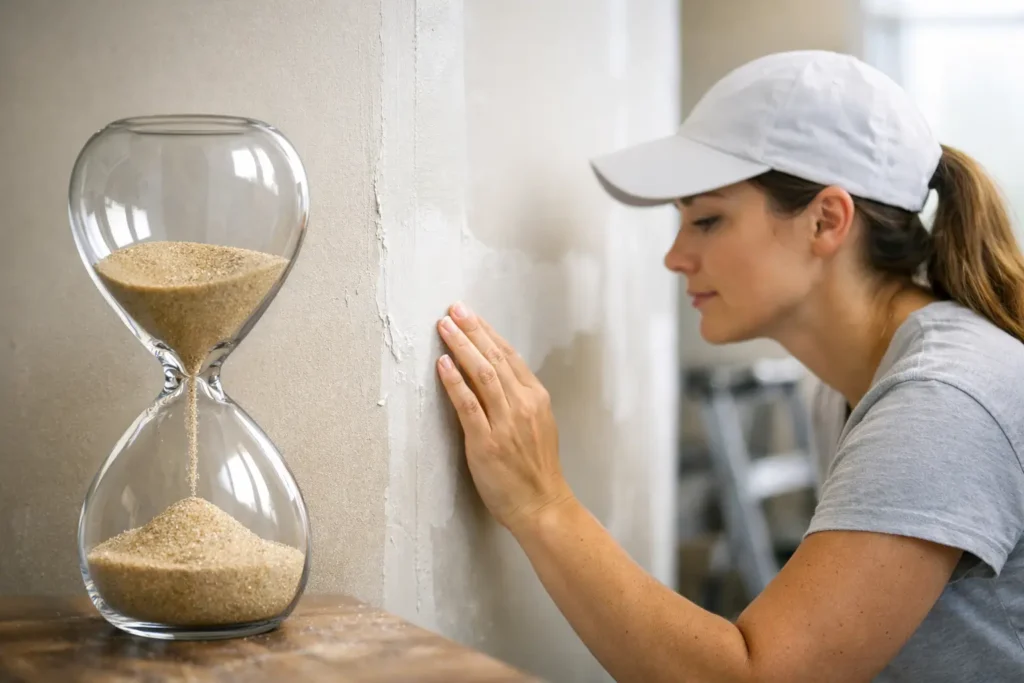
Fresh mud can look dry on the surface and still be soft underneath. That is where a lot of drywall problems start. If you are asking how long does drywall mud take, the honest answer is usually about 24 hours per coat for standard joint compound – but real dry time depends on mud type, coat thickness, humidity, airflow, and room temperature.
If you are patching a wall, finishing a basement, or getting a room ready for paint, timing matters. Rush the next coat too soon and you can trap moisture, cause shrinking, or end up sanding more than necessary. Wait too long and the job drags out. The goal is not just dry mud. It is a smooth, durable finish that stays clean once the paint goes on.
How long does drywall mud take in most jobs?
For standard premixed all-purpose or lightweight joint compound, a full 24 hours is the safe expectation between coats. In ideal conditions, some thin coats may dry faster, sometimes in 12 to 18 hours. Thicker applications can take longer than a day.
That range matters because drywall finishing is done in layers. A taped joint, a second coat, and a finish coat do not all dry at the same speed. The first coat often takes the longest because the tape and the joint both hold moisture. A skim coat over a wide area may also need extra time, especially if the room is cool or damp.
Setting-type compound is different. This is the powder mud often labeled 20, 45, or 90 minute. Those numbers refer to set time, not full dry time. It hardens chemically much faster than regular mud, which makes it useful for repairs and tighter schedules, but it may still need time before sanding or painting depending on thickness and site conditions.
What affects drywall mud drying time?
The biggest factor is the type of compound being used. Premixed joint compound dries by evaporation, so it depends heavily on the room environment. Setting-type mud hardens through a chemical reaction, so it is less affected by humidity, though not completely immune to it.
Thickness is the next major factor. A thin finish coat over a properly prepared joint dries much faster than a heavy patch packed into a damaged area. If a repair has deep voids, it often needs to be built in stages rather than filled all at once. That saves time overall because each layer can dry more evenly.
Humidity slows everything down. On rainy days or in basements with poor air movement, mud can stay damp much longer than expected. Temperature also matters. Warm, dry rooms help. Cold rooms do not. If the space is below normal indoor temperature, drying slows and the mud may stay soft longer than it looks.
Airflow helps more than people think. A room with moving air usually dries compound faster than a sealed room with still, humid air. That does not mean blasting heat directly at the wall is always the right move. Forced drying can sometimes create uneven results, especially on thicker coats.
Typical drying times by coat and repair type
A taped joint with standard mud is often ready for a second coat in about 24 hours. If the bead of mud under the tape was heavy or the joint is over a recessed area that holds more material, it may need longer.
A second coat is usually a little wider and thinner, so it may dry in roughly the same timeframe or slightly faster. A finish coat, when applied properly, is often the quickest coat to dry because it should be light and controlled.
Small nail holes and shallow dings can dry much faster. Some minor touch-ups may be ready in a few hours if the patch is very light. Larger repairs, corner bead work, and skim coating across broader surfaces can take a full day or more per pass.
Ceilings also deserve special mention. Mud on ceilings often dries slower than people expect, especially when ventilation is poor. If the ceiling has had popcorn texture removed or has multiple repaired seams, patience matters. A smooth ceiling shows every flaw once the light hits it.
How to tell if drywall mud is actually dry
Color is one clue. Most joint compounds lighten as they dry. Darker gray or damp-looking areas usually mean there is still moisture present. A uniform, lighter color is a better sign that the coat is ready.
Touch helps too, but only to a point. Dry mud should feel firm, not cool, soft, or rubbery. If you press lightly and it gives under your finger, it is not ready. Be careful not to damage the surface while checking.
The most reliable approach is to combine visual inspection with time and site conditions. If the room is humid and the coat was heavy, assume it needs more time. A little patience is cheaper than rework.
Can you speed up drywall mud drying?
Yes, but there is a right way to do it. Better airflow is the safest first step. Fans that move air through the room can help moisture leave the surface more consistently. Running the HVAC system can also help if it keeps the room warm and dry.
A dehumidifier is one of the best tools in damp spaces. It is especially useful in basements, after water events, or during wet weather. Lower humidity usually means more predictable drying.
Moderate heat can help, but avoid extreme heat aimed directly at one spot. Too much concentrated heat can dry the outer surface faster than the material underneath, which is not ideal for a clean finish. It is better to warm the room than to overheat the wall.
If speed is critical, choosing the right product matters more than trying to force standard mud to dry faster. Setting-type compound can keep a repair moving, especially for emergency patches or fast turnaround work. Still, faster is not automatically better if the finish quality suffers.
The mistake that costs the most time
The most common mistake is applying mud too thick. People often try to finish a joint or patch in one heavy pass, hoping to save a step. In practice, that usually means longer drying, more shrinkage, extra sanding, and a higher chance of visible defects.
Professional drywall finishing is about controlled coats. The first pass secures the tape or fills the repair. The next pass builds the area. The final pass refines it so the surface blends cleanly into the surrounding wall or ceiling. That process takes discipline, but it produces a better result.
Another costly mistake is painting too soon. Even if the mud feels mostly dry, leftover moisture can affect primer and paint adhesion. It can also highlight joints and patches after the finish coat goes on. If the wall needs to look truly uniform, especially under natural light or in high-end level 4 and level 5 finishes, dry time is not the place to cut corners.
When dry time becomes a jobsite issue
For homeowners, drywall mud delays usually mean waiting an extra day before sanding or painting. For contractors and property managers, delays can affect multiple trades. If a room is scheduled for trim, paint, or turnover, wet mud can hold up the sequence.
That is why planning matters. The right mud for the right stage, proper ventilation, and clean application all make the schedule more predictable. On repair work, that also means understanding what is behind the damage. A wall that has absorbed moisture, for example, may need more than a surface patch.
On jobs across Niagara, St. Catharines, and Hamilton, changing weather can also affect interior drying conditions more than people expect. Even indoors, seasonal humidity can stretch timelines if the space is not properly managed.
So, how long should you really wait?
If you want the practical answer, wait 24 hours between coats of regular drywall mud unless conditions are ideal and the coat is very thin. For deep repairs, ceilings, humid rooms, or broad skim coats, expect longer. For setting-type mud, follow the product timing carefully, but remember that hardening and full readiness are not always the same thing.
A good finish is never just about speed. It is about knowing when the surface is ready for the next step so the final result stays smooth, durable, and paint-ready. If your walls or ceilings need professional finishing, patching, or a fast repair done right, getting experienced hands on the job can save you a lot more time than trying to guess the dry time from appearance alone.
When the finish needs to look clean from every angle, the smartest move is to give the mud the time it actually needs.






