
Drywall Finishing Guide for Smooth Walls

How to Finish Drywall Seams the Right Way
29 mayo, 2026
How to Repair Drywall Holes the Right Way
2 junio, 2026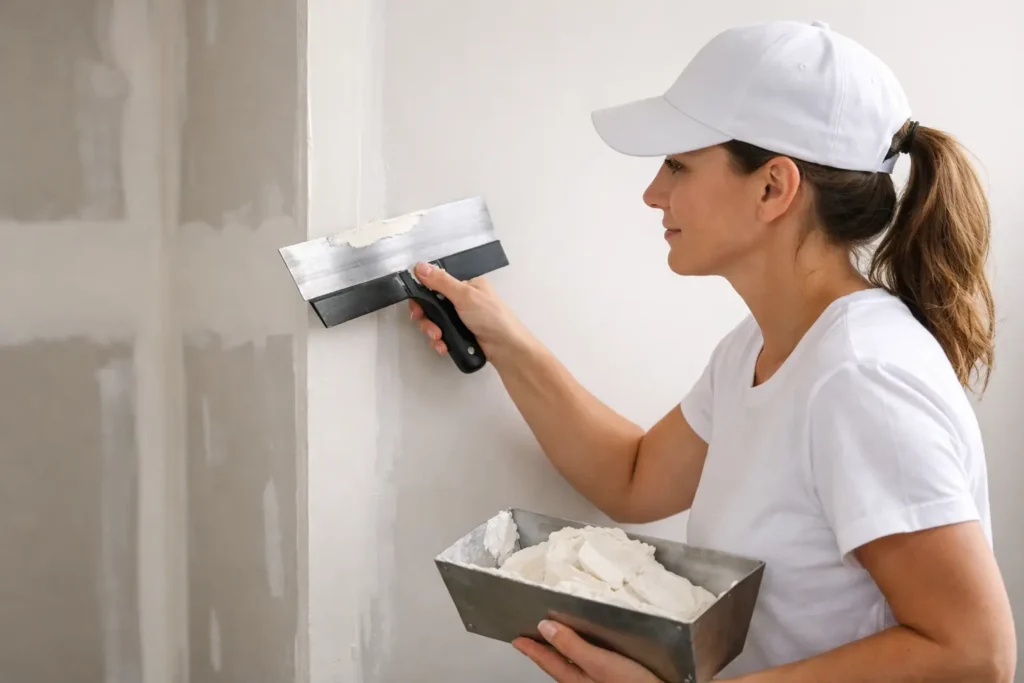
A wall can look straight from across the room and still fall apart under paint. Seams flash, fasteners show, and every patch starts asking for attention the minute sunlight hits it. That is why a solid drywall finishing guide matters – not just for appearance, but for getting a surface that stays clean, consistent, and ready for the final coat.
For homeowners, builders, and property managers, drywall finishing is usually the point where a project starts to look finished or starts to show problems. Hanging board is one phase. Creating a smooth, durable surface is another. The difference comes down to technique, timing, and knowing what level of finish the space actually needs.
What this drywall finishing guide should help you understand
Drywall finishing is the process of treating joints, corners, fasteners, and surface imperfections so the wall or ceiling looks continuous once painted. That sounds simple, but a good finish depends on several small decisions going right in sequence. The tape has to bond properly. The compound has to be applied in the right thickness. Each coat has to dry fully. Sanding has to flatten the surface without scarring the face paper.
When one of those steps is rushed, the result usually shows up later. You may see hairline cracks at seams, ridges at butt joints, pitting in the mud, or uneven texture under direct light. These are common issues on both residential and commercial jobs, especially when the schedule is tight or the finish level was not matched to the room.
Understanding finish levels before work starts
One of the biggest mistakes on a drywall job happens before the first coat of compound goes on. People assume every room needs the same finish. It does not.
Level 4 is the standard choice for many painted interiors. It works well in spaces with normal wall paint and typical lighting conditions. If the paint has a flat or low-sheen finish and the walls are not under harsh side lighting, Level 4 often delivers a strong result.
Level 5 goes a step further. It includes the same joint treatment as Level 4, plus a thin skim coat across the entire surface. This helps reduce visible joint lines and surface variations, especially under critical lighting. If you have large open rooms, smooth ceilings, tall walls, or strong natural light, Level 5 is often the smarter investment.
It depends on the room, the paint sheen, and the expectations. A hallway with soft lighting and eggshell paint is different from a living room with floor-to-ceiling windows. A commercial lobby is different from a storage room. Choosing the right finish level early saves rework later.
The core stages of drywall finishing
The first stage is taping. Joints are covered with paper tape or mesh tape embedded in compound. Inside corners need a clean, straight tape line. Outside corners usually rely on corner bead for strength and definition. If tape is not seated properly, bubbles or loose edges can show up quickly.
The second stage is the fill coat. This coat builds over the taped joints and begins to hide fasteners, bead edges, and transitions. The goal is not to make everything perfect in one pass. It is to create a flat, controlled base for the next coat.
The third stage is the finish coat. This is where experienced workmanship really shows. The compound is feathered wider, edges are cleaned up, and small inconsistencies are corrected before sanding. Good finishers know that a smooth wall is built gradually. Heavy mud application usually creates more sanding, more dust, and more visible defects.
The final stage is sanding and touch-up. Sanding should remove ridges and tool marks without digging into the paper or creating hollow spots. Then the wall needs inspection under proper light. Some flaws only appear when the surface is viewed from the side, not straight on.
Why smooth ceilings are less forgiving than walls
Ceilings tend to expose finishing errors faster than walls. Light moves differently overhead, and even minor waviness can become visible once paint dries. This is especially true when removing a popcorn ceiling and converting it to a smooth finish.
A smooth ceiling has almost no place to hide imperfections. Patchwork, uneven skim areas, and joint lines often become more obvious than expected. That is why ceiling work usually requires more patience, tighter quality control, and a realistic expectation of drying time between coats.
If the ceiling has old texture damage, water staining, or previous repairs, prep becomes even more important. A clean-looking result depends on stabilizing the surface first, not just covering it with new compound.
Common problems that show up after painting
A wall can seem acceptable before paint and still disappoint once primer and finish paint go on. Paint tends to reveal everything. High spots, shallow seams, scratches, and poor feathering often become much more noticeable after the surface is coated.
Flashing is one of the most common complaints. This happens when patched or finished areas absorb paint differently than surrounding drywall. The surface may look dull in one area and shiny in another, even if the color matches. Proper finishing, priming, and surface consistency help reduce that effect.
Shrinkage is another issue. If compound is applied too thick or not allowed to dry completely, joints can sink slightly as the material cures. What looked flat during application may show a visible depression later.
Cracking at seams can point to movement, poor tape embedment, or weak joint treatment. Nail or screw pops may indicate framing movement or fastening issues rather than finishing alone. That is where experience matters – not every surface defect has the same cause, and the repair approach should match the problem.
When patching is enough and when a skim coat makes more sense
Small damage does not always call for full resurfacing. Minor holes, dents, and local repairs can often be patched and blended successfully if the surrounding wall is in good shape. That is the practical solution for many homes, rental turnovers, and targeted repairs.
But patching has limits. If a wall has multiple old repairs, texture inconsistencies, broad surface wear, or visible waves from previous work, isolated fixes may only make the overall finish look more uneven. In those cases, a skim coat can create a much more uniform result.
This is especially relevant before repainting a highly visible room. If the goal is a cleaner, more polished look, a full skim coat can be more cost-effective than chasing one defect after another. It is more work upfront, but sometimes it is the only way to get a surface that truly reads as finished.
What separates professional drywall finishing from rushed work
The difference is usually not one dramatic step. It is a series of disciplined choices. Professionals pay attention to compound consistency, knife width, drying conditions, edge control, and inspection lighting. They know that faster is not always better, especially with premium finishes.
Rushed work often leaves behind excessive sanding marks, overbuilt joints, muddy corners, or surfaces that look acceptable only until daylight hits them. Clean finishing is about restraint as much as effort. The best result usually comes from applying the right amount of material, not the most material.
On occupied properties, there is also the matter of cleanliness and coordination. Dust control, protection of nearby surfaces, and clear communication matter almost as much as the finish itself. For homeowners and property managers, reliability on site is part of the service.
How to know when to bring in a specialist
If the project involves Level 5 finishing, extensive ceiling work, popcorn ceiling removal, or visible repairs in high-traffic spaces, specialist help usually pays off. The same is true when a job has to match existing smooth walls or when the final paint will have sheen that highlights defects.
A straightforward patch is one thing. A surface that has to look uniform across an open room is another. Commercial spaces, remodels, custom homes, and properties being prepared for sale all benefit from a higher standard of finish because visual flaws are harder to ignore when the rest of the space is clean and updated.
For clients in Niagara, St. Catharines, and Hamilton, that often means choosing a team that handles both full finishing projects and smaller urgent repairs. TH Taping is built around that kind of practical service – precise work, fast response, and surfaces that are ready for paint without guesswork.
A better finish starts before the paint does
The quality of a painted room is set long before the painter opens a can. If the drywall finish is uneven, no paint color will hide it for long. If the surface is flat, properly feathered, and matched to the lighting in the room, everything that comes after looks better.
Whether you are dealing with a new build, a remodel, a ceiling update, or a repair that needs to disappear, the goal is the same: walls and ceilings that look clean, hold up well, and make the whole space feel finished. When the finishing is done right, you stop noticing the wall itself – and that is exactly the point.






