
How to Repair Drywall Cracks That Keep Coming Back

Fire Rated Drywall for Safer Interior Projects
2 septiembre, 2026
A Popcorn Ceiling Makeover Case Study Done Right
6 septiembre, 2026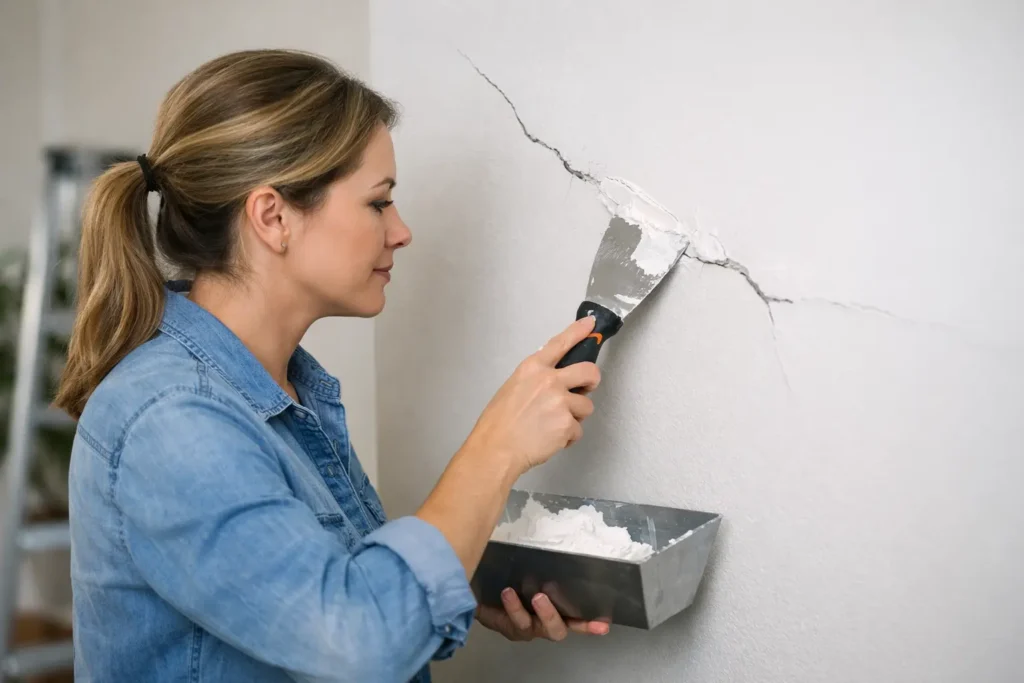
A crack that reappears through fresh paint is more than frustrating. It usually means the wall was patched without addressing movement, loose material, or the joint beneath it. Knowing how to repair drywall cracks correctly helps you avoid doing the same repair twice and gives your wall a clean, paint-ready finish.
Most small cracks are repairable with the right preparation and a little patience. But not every crack is a cosmetic issue. Before applying joint compound, take a close look at where the crack is located, how wide it is, and whether it has changed over time.
Start by identifying the type of drywall crack
Hairline cracks often appear along drywall seams, especially in newer homes that are still settling. Seasonal temperature and humidity changes can also cause framing and drywall to expand or contract slightly. These cracks are usually cosmetic, but they still need reinforcement to keep them from returning.
A straight crack that follows a seam is often caused by loose or failing tape. You may see a raised line, bubbling tape, or a crack that runs along the edge of a drywall sheet. This repair needs more than a quick coat of compound. The loose tape must be removed or secured, then the joint needs to be retaped and finished properly.
Cracks around doors, windows, and corners may be caused by normal movement, but they deserve closer attention. A diagonal crack wider than about 1/8 inch, a crack that continues to grow, or one paired with sticking doors, uneven floors, or moisture damage can point to a bigger issue. In that case, have the structure or water source evaluated before repairing the drywall.
Ceiling cracks require the same care, with one added concern: safety. If a ceiling is sagging, stained, soft, or separating from framing, do not simply cover it with compound. Identify the cause first, especially if there has been a roof leak, plumbing leak, or heavy moisture exposure.
Tools and materials for a lasting repair
For a typical seam or hairline crack, gather a utility knife, drywall sanding sponge, drywall screws, joint tape, all-purpose joint compound, a 4- to 6-inch taping knife, a wider finishing knife, primer, and matching paint. Paper tape is a strong choice for flat seams and inside corners when embedded correctly. Self-adhesive mesh tape is convenient, but it is best used with setting-type compound because standard premixed compound can be more likely to crack over mesh.
Setting-type compound comes as a powder and hardens through a chemical reaction. It is useful for the first coat over deeper repairs because it sets harder and shrinks less. Premixed all-purpose compound is easier to spread and sand, making it a good option for final coats. Many professional repairs use both: setting compound for strength, followed by lighter finishing coats for a smooth surface.
How to repair drywall cracks step by step
1. Open the crack and remove weak material
Do not spread compound directly over a narrow crack and expect it to last. Use a utility knife to carefully widen the crack into a shallow V shape. This gives the compound enough space to bond inside the damaged area rather than sitting on top of it.
Scrape away loose paint, crumbling compound, and any lifted drywall tape. If the crack follows a seam and the tape has separated, cut out the loose section until you reach tape that is firmly bonded to the drywall. Dust the area with a dry brush or cloth before moving on.
2. Secure movement at the seam
If the drywall shifts when you press near the crack, add drywall screws before taping. Drive screws into the framing on both sides of the seam, keeping them about 1 inch away from the crack. The screw heads should sit just below the drywall surface without tearing the paper face.
This small step matters. Joint compound cannot stop two drywall sheets from moving independently. Securing the board first gives the new tape a stable surface and reduces the chance of another crack.
3. Apply compound and tape
Spread a thin, even layer of joint compound over the crack or opened seam. Place paper tape over the wet compound, then use the taping knife to press it into place. Start at one end and work toward the other, holding the knife at a slight angle to push out excess compound and air bubbles.
The tape should lie flat with enough compound beneath it to bond, but not so much that it floats or wrinkles. Apply a light skim coat over the tape immediately. Avoid building thickness at this stage. A repair that is too heavy will take longer to dry and will be harder to blend into the surrounding wall.
For a simple hairline crack that is not on a seam, fiberglass mesh tape can work well when paired with setting-type compound. The trade-off is that mesh can leave a more visible texture if the finishing coats are too narrow or too thin.
4. Build wide, thin finishing coats
Let the first coat dry completely, then lightly scrape off ridges with your taping knife. Apply a second coat using a wider knife, feathering the compound several inches beyond the taped area. The goal is not to create a thick patch. It is to create a gradual transition that disappears once primed and painted.
After the second coat dries, sand lightly and inspect the repair from the side with a work light. Side lighting reveals dips, edges, and tool marks that overhead room lighting can hide. Apply a final, wider skim coat if needed. For walls that receive glossy paint or strong natural light, take extra time with this step. Higher-sheen finishes reveal flaws much more easily than flat paint.
5. Sand, prime, and paint the repaired area
Use fine-grit sandpaper or a sanding sponge to smooth the repair without digging into the tape. Wipe away dust before priming. Primer is not optional on a patched area because joint compound absorbs paint differently than painted drywall. Without primer, the repaired spot can flash through as a dull or uneven patch.
Once the primer dries, inspect again under normal and side lighting. Then apply paint, blending it across a larger section of wall when possible. Touch-up paint can work for small repairs, but color differences are common if the existing paint has faded, has a different sheen, or was applied with a different roller texture.
Common mistakes that make cracks return
The most common mistake is using spackle or compound alone without tape. Spackle is useful for nail holes and shallow dents, but it does not reinforce an active drywall seam. Another frequent problem is applying thick coats to save time. Thick compound shrinks, dries unevenly, and often leaves a visible hump.
Skipping the inspection stage is another costly shortcut. A wall crack caused by moisture, a loose drywall sheet, or structural movement will return unless the underlying condition is corrected. The repair may look good for a few weeks, then reopen after the next season change.
Rushing sanding and painting can also ruin otherwise solid work. If compound is still damp beneath the surface, sanding can tear it, and paint can trap moisture. Give each coat adequate drying time based on the product instructions, room temperature, and humidity level.
When to call a drywall professional
A small, stable hairline crack is a reasonable DIY project. Larger seam failures, repeated cracks, damaged corners, water-stained ceilings, and repairs in highly visible areas are different. These jobs require the right taping technique, broad feathering, and surface inspection to make the repair disappear.
For homeowners and property managers in Niagara Region, St. Catharines, and Hamilton, TH Taping can handle small drywall repairs as well as complete finishing work. This is especially useful when a repair must blend into a smooth ceiling, a level 4 wall finish, or a space being prepared for premium paint.
The best drywall repair is the one you stop noticing. Take the time to stabilize the surface, reinforce the crack with tape where needed, and finish the area wide enough to blend naturally. If the cause is unclear or the result needs to look flawless under bright light, getting experienced help early can save time, paint, and repeat repairs.






