
Why Does Fresh Paint Show Seams on Drywall?

Drywall Mudding and Sanding for Flawless Walls
19 agosto, 2026
Interior Wall Finishing Options That Look Better
23 agosto, 2026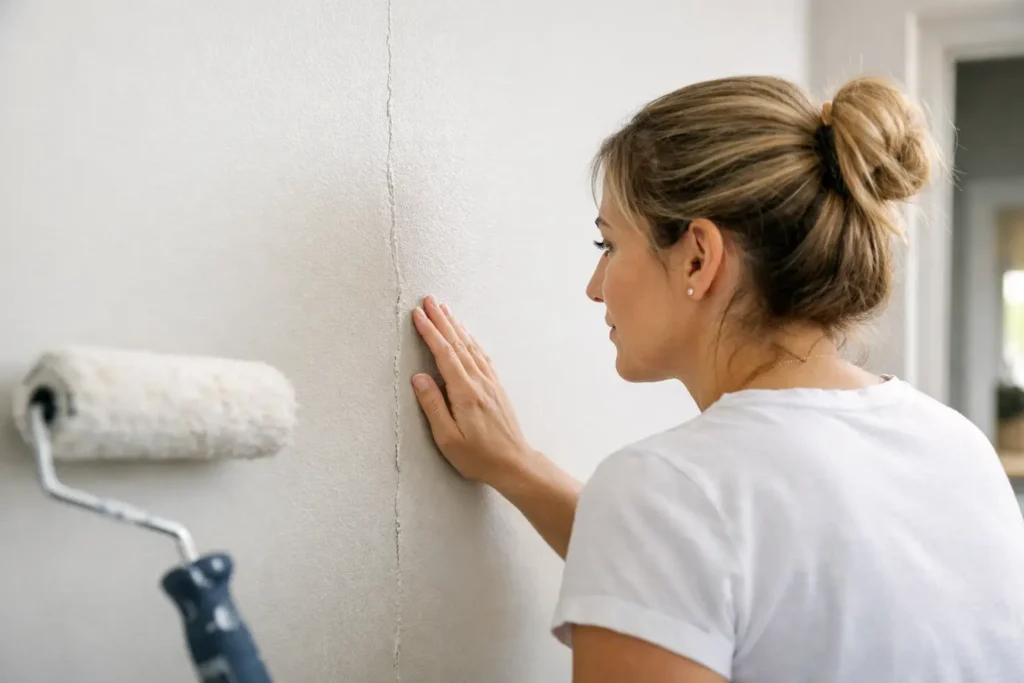
A wall can look perfectly acceptable before painting, then suddenly show every drywall joint after the first coat. That is why homeowners often ask, why does fresh paint show seams when the drywall looked smooth just a day earlier? In most cases, the paint did not create the problem. It revealed a finishing issue that was already there.
Fresh paint changes how light moves across the wall. It adds color, sheen, and contrast, making shallow ridges, low spots, joint lines, and uneven texture much easier to see. The good news is that visible seams can usually be corrected. The right repair depends on whether the issue is poor feathering, a sunken joint, flashing, movement, or damage beneath the finish.
Why Does Fresh Paint Show Seams on Drywall?
Drywall seams are covered with joint tape and several coats of compound. The goal is not simply to cover the tape. The compound must be feathered wide enough that the transition disappears when light hits the wall from different angles.
When that transition is too narrow, too high, too low, or unevenly sanded, paint brings it into focus. A flat wall finish reflects light evenly. A poorly blended seam interrupts that reflection and creates a visible line, shadow, or raised band.
This is especially common on long walls, ceilings, stairwells, and rooms with large windows. Natural side light can expose minor drywall flaws that are hard to notice under ordinary overhead lighting.
The joint compound was not feathered wide enough
A taped joint needs progressively wider coats of compound. If the final coat stops too close to the center of the joint, the wall can feel smooth to the touch but still look like a stripe after painting.
This is one of the most common reasons seams show through. Sanding alone will not fix it. In fact, aggressive sanding can make the issue worse by thinning the compound near the edges or exposing tape. The proper correction is usually another wide finish coat, followed by controlled sanding and primer.
The seam is raised, sunken, or uneven
A raised seam catches light and creates a noticeable ridge. A sunken seam produces a shadow line. Both problems can appear more dramatic after paint because the new surface is uniform in color but not in profile.
Sunken joints may occur when compound shrinks as it dries, when too little material was applied, or when a repair was rushed between coats. Raised joints can result from excess compound, poorly embedded tape, or sanding that did not level the high area.
Primer and paint are flashing differently
Sometimes the line is not a physical ridge at all. It is a difference in sheen or color absorption called flashing. Drywall paper, dried joint compound, patches, and previously painted surfaces can absorb paint differently.
Without a proper primer, the repaired area may dry duller or shinier than the surrounding wall. This can resemble a seam, particularly in rooms with satin or eggshell paint. A quality drywall primer helps equalize the surface before the finish coats are applied.
The wall is getting strong side lighting
Lighting matters more than many people expect. Windows, patio doors, skylights, and wall-mounted fixtures can cast light nearly parallel to the surface. This is called critical lighting, and it reveals every imperfection.
A finish that looks acceptable in a dim room may not hold up beside a large south-facing window. In these spaces, a standard finish may need additional skim coating or a level 5 finish to achieve the clean, consistent appearance the room demands.
Fresh Paint Can Reveal Old Repairs Too
Seams are not always from new drywall work. A freshly painted room may reveal an older patch, a repaired crack, nail pops, or a previous water-damage repair that was never fully blended into the wall.
Paint also makes it easier to see where a contractor stopped and started a repair. If the patched section was not feathered beyond the immediate damaged area, the outline can appear as a rectangle, band, or dull spot after painting.
Before deciding that the painter caused the issue, look closely at the surface in angled light. If you can see or feel a ridge, dip, tape edge, or repair outline, the primary problem is drywall finishing. If the wall feels flat but the sheen changes, primer, paint choice, or application may be the bigger factor.
How Professionals Diagnose Visible Drywall Seams
A reliable diagnosis starts before anyone adds more paint. Painting over a visible seam rarely makes it disappear, and extra coats may actually make a ridge more noticeable.
A drywall professional will inspect the wall from several angles and use a bright work light held close to the surface. This quickly shows whether the problem is physical or only visual. They will also check for loose tape, cracking, moisture staining, movement around framing, and differences in texture.
The repair approach changes based on what is found. A shallow low spot may only need a broad skim coat. Loose tape needs to be removed or resecured before refinishing. A repeating crack can point to structural movement and may require a more durable repair method than compound alone.
The Right Way to Fix Seams Showing Through Paint
For small, stable seams, the repair process is straightforward but detail-sensitive. The painted surface is first sanded or scuffed enough for new compound to bond properly. Any loose material, bubbling tape, or damaged drywall paper must be addressed before the finish work begins.
Widen the repair instead of building it up
The objective is to create a gradual transition across a broad area, not to pile compound directly on top of the line. A wider knife or skimming tool allows the repair to fade into the surrounding wall.
Multiple thin coats are generally better than one heavy coat. Thin coats dry more predictably, shrink less, and are easier to level. Each coat should be allowed to dry fully before the next is applied.
Sand for flatness, not just smoothness
A wall can feel smooth while still being visibly uneven. Professional sanding focuses on keeping the entire plane flat, especially across the edges of the repaired joint.
The wall should then be checked under angled light again. This step is where small flaws are found before primer and finish paint make them obvious.
Prime the repaired area before painting
Primer is not an optional shortcut after drywall work. It seals the joint compound and helps the finish paint absorb consistently across the wall.
For best visual consistency, the repaired area should be primed, checked after drying, and then painted with the same product and sheen used on the rest of the surface. Depending on the age and condition of the existing paint, painting the full wall from corner to corner is often the best way to avoid lap marks or color variation.
When a Level 5 Finish Is Worth It
Level 4 drywall finishing works well for many standard walls and rooms. However, some conditions call for a higher standard. A level 5 finish includes a thin skim coat over the entire surface, helping reduce visible variations in porosity and minor surface texture.
It is a strong choice for walls with critical lighting, high-gloss or dark paint, smooth ceilings, open-concept spaces, and premium renovations where the finish will be closely noticed. It does add labor and material cost, so it is not necessary in every room. But where light is unforgiving, it can prevent the frustration of seeing seams after the room is painted.
Can You Hide Drywall Seams With Paint?
Paint can reduce minor visual differences, but it cannot reliably hide poor drywall work. Flat paint is more forgiving than satin, semi-gloss, or gloss, and lighter colors tend to show less than deep, dark colors. Those choices can help, but they are not a real repair for a visible ridge or sunken joint.
Textured finishes can also disguise minor flaws, though they change the look of the room and may not match a smooth-wall renovation. If the goal is a clean, modern finish, repairing the drywall properly is the better long-term choice.
Know When to Call for a Drywall Repair
A single faint seam in an out-of-the-way room may be a manageable touch-up. Repeated seams, visible tape, cracks, ceiling lines, or major flashing across several walls are different. Those signs often mean the surface needs professional refinishing before more paint is applied.
For homeowners, property managers, and contractors in Niagara, St. Catharines, or Hamilton, TH Taping can assess the condition of the drywall and recommend a practical repair – from a small patch to full skim coating or a level 5 finish. A clean paint job starts with a wall that is truly flat, properly primed, and ready for the light in the room.






