
How to Spot Poor Drywall Finishing Before Paint

Top Drywall Repair Mistakes Homeowners Make
5 agosto, 2026
Renovation Drywall Finishing Process, Done Right
9 agosto, 2026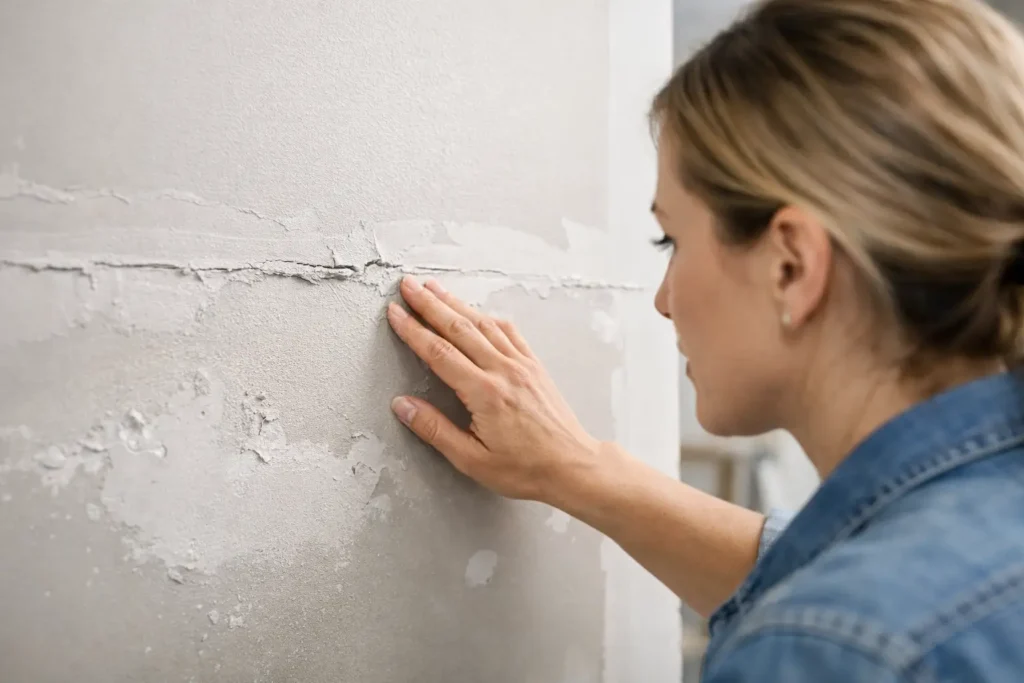
A wall can look perfectly acceptable at noon and look unfinished the moment a lamp, window, or fresh coat of paint hits it. Knowing how to spot poor drywall finishing before the painter starts can prevent frustrating touch-ups, delayed move-ins, and the cost of repainting after defects become impossible to ignore.
Drywall finishing is the work that makes seams, fasteners, corners, and repairs disappear. When it is done well, the room feels clean and intentional without calling attention to the walls or ceiling. When it is rushed, the problems may be subtle at first, but they rarely stay subtle once the room is fully lit and painted.
Why drywall flaws show up after painting
Joint compound is designed to create a smooth transition between drywall boards, taped seams, screw heads, and corner bead. It is not meant to leave visible ridges, rough texture, or uneven planes. A proper finish requires multiple coats, controlled sanding, and careful inspection under the right lighting.
Paint changes how the surface reflects light. Flat paint can hide minor imperfections better than satin, eggshell, semi-gloss, or glossy paint, but it cannot correct a poor finish. Dark colors and strong side lighting are even less forgiving. That is why a wall that looks fine before paint can suddenly show every seam and sanding mark after the final coat.
Ceilings deserve the same attention. Overhead lighting, large windows, and smooth ceiling designs can reveal waves, patches, and uneven joints that are hard to see from directly below.
How to spot poor drywall finishing in different light
The fastest way to inspect drywall is to stop looking only straight at it. Stand at one end of the wall and look across the surface at a shallow angle. This is called raking light, and it exposes high and low spots that front-facing light can hide.
Use a bright work light, flashlight, or portable lamp held near the wall and aimed across it. Move the light slowly from side to side, then inspect from several angles. Do this before primer whenever possible, and do it again after primer if the project allows. Primer often reveals flaws that bare drywall can conceal.
Natural light matters too. Check walls near large windows in the morning, afternoon, and evening if possible. A surface that passes inspection under overhead lights may show obvious imperfections when low sunlight runs across it. This is especially important in living rooms, hallways, stairwells, and rooms with large patio doors.
Do not judge a finish from several feet away only. Step close enough to inspect details, then step back to see whether the wall reads as one continuous plane. Both views matter. A tiny pinhole may be easy to repair, while a wide joint ridge can affect the appearance of the entire room.
The most common signs of poor drywall finishing
Visible seams and raised joint lines
A drywall seam should blend into the surrounding surface. If you can see a straight line running across a wall or ceiling, the joint may not have been feathered wide enough, sanded evenly, or coated sufficiently.
Run your hand lightly across the area. A small change in texture is normal before final paint, but you should not feel a noticeable hump or hard edge. Wide, smooth feathering is what makes taped joints disappear. A narrow buildup of compound often creates a raised stripe that becomes more visible after painting.
Nail pops, screw dimples, and fastener shadows
Fasteners should be slightly recessed and fully covered with compound, without breaking the paper face of the drywall. Poor finishing may leave screw heads visible, shallow dimples around fasteners, or circular patches that flash through paint.
A nail pop is different from a simple finishing issue. It occurs when a fastener moves outward, sometimes because of framing movement or inadequate fastening. If you see a round bump or a screw head pushing through, the repair should address the fastener itself before it is refinished. Covering the bump with more compound may hide it temporarily, but it will not solve the movement underneath.
Cracks at seams and inside corners
Hairline cracks where two drywall boards meet are a clear warning sign. They may result from poor tape adhesion, insufficient joint compound, structural movement, moisture, or seasonal expansion and contraction. Cracks at inside corners are particularly common when the tape was not embedded properly.
A single, very fine crack does not always mean a major structural problem. Still, it should be inspected before painting. If a crack is active, widening, or returning after previous repairs, a professional should determine whether the issue is limited to the drywall finish or connected to movement in the building.
Bubbles, blisters, and loose tape
Tape that lifts, bubbles, or separates from the wall is not a cosmetic detail to paint over. It means the tape is not securely bonded to the joint compound. You may see a raised line, a blister under the tape, or an edge beginning to peel away.
These areas need to be cut out, retaped, and refinished. Simply adding compound over loose tape can leave the weak area underneath, where it may crack or release again later.
Sanding scratches, rough patches, and pinholes
A finished drywall surface should feel smooth, not polished like glass. Yet it should not have obvious sanding swirls, rough ridges, grit, or drag marks. These defects are especially visible under paint with any sheen.
Pinholes are tiny openings in dried compound. A few isolated pinholes can happen, but widespread pinholing often points to poor application, rushed drying, or inadequate final coating. They can create a speckled appearance after paint and may require skim coating or targeted touch-up before the painter proceeds.
Uneven corners and damaged corner bead
Outside corners should look straight, crisp, and durable. Look down the corner from one end. If it waves, leans, has dents, or shows metal or plastic bead through the compound, it needs attention.
Inside corners should be clean and consistent, without heavy buildup on one side or a ragged tape line. In a high-traffic area, damaged outside corners are more than an appearance problem. If the corner bead is loose or cracked, it can continue to fail with normal use.
Patch outlines that do not blend in
Repairs should disappear into the surrounding wall, not look like a square or round island of compound. Poorly finished patches often have hard edges, uneven texture, or a different surface profile from the original drywall.
This is common with small repairs because it is tempting to keep the patch area too tight. The repair compound must extend beyond the damaged area and be feathered gradually. The larger the damage, the wider the blend usually needs to be.
Check ceilings with extra care
Ceilings are among the hardest surfaces to finish well because light often travels across them. A smooth ceiling with visible seams, ridges, or broad shallow waves can make an otherwise well-renovated room feel incomplete.
Inspect ceiling joints from multiple points in the room, especially beneath pendant lights, pot lights, and window walls. Look for straight lines between boards, uneven areas around fixtures, and patches that catch light differently. If a popcorn ceiling was removed, look for leftover texture, exposed imperfections, or inconsistent skim coating.
For smooth ceilings in open rooms, higher finishing standards are often worth the investment. A Level 5 finish, which includes a thin skim coat over the surface, can be the right choice when using critical lighting, dark paint, or a higher-sheen finish. Not every room needs Level 5, but some rooms will reveal the difference immediately.
Know the difference between minor touch-ups and a redo
Not every imperfection calls for a full refinishing job. A few pinholes, a light sanding mark, or one small corner nick can often be corrected quickly before paint. The key is to address it early, while the surface is still accessible and the repair can blend properly.
More widespread defects usually require a broader approach. Visible seams across multiple walls, loose tape, repeated cracks, heavy joint ridges, or uneven ceiling planes are signs that spot repairs may not deliver a consistent result. In those cases, a professional may need to recoat joints, skim coat selected surfaces, or remove and replace failed tape.
The right level of repair depends on the lighting, paint color, paint sheen, room use, and your expectations for the space. A rental unit with flat paint has different practical needs than a newly renovated home with floor-to-ceiling windows and satin paint. But no project benefits from painting over known defects.
Inspect before the painter arrives
The best time to raise concerns is after the final sanding and before primer or paint. Mark issues with low-tack painter’s tape rather than writing directly on the wall. Place the tape near the defect so the area is easy to find without damaging the surface.
Walk through the room slowly and inspect walls, corners, repairs, and ceilings in the same order each time. Use the lighting conditions the finished room will actually have. If a wall will sit beside a large window or under wall sconces, test it there instead of relying only on general room lighting.
Take photos of larger concerns and discuss them clearly with the contractor. A good drywall finisher should welcome a reasonable punch-list review before paint. Clear communication at this stage protects the finish, the schedule, and everyone’s expectations.
If your walls or ceilings show seams, rough repairs, loose tape, or flaws that become obvious under light, do not let paint become the cover-up plan. A careful repair now gives the room the clean, durable surface it was meant to have – and lets every coat of paint look its best.






