
Wall Surface Prep for Painters Done Right

New Construction Drywall Finishing Done Right
31 julio, 2026
8 Best Ceiling Texture Alternatives for a Clean Look
3 agosto, 2026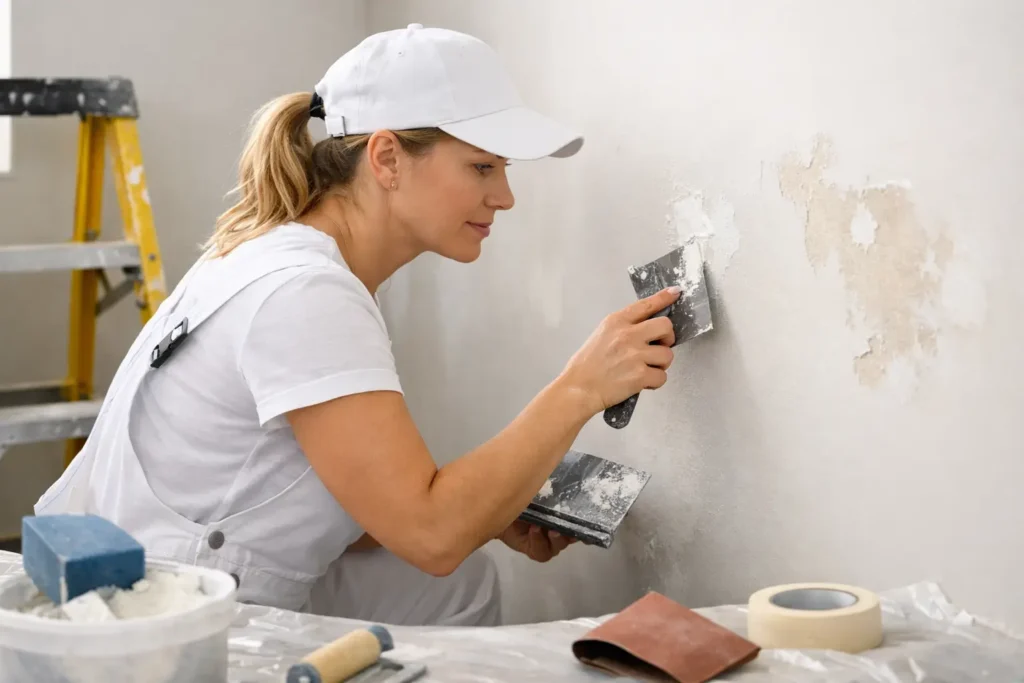
A fresh coat of paint cannot hide a rough drywall seam, a shallow patch, or a glossy spot where old paint was never properly cleaned. In fact, paint often makes those flaws easier to see. Proper wall surface prep for painters is what creates the clean, even canvas a quality finish requires.
For homeowners, property managers, and contractors, this step can determine whether a room looks newly finished or merely repainted. The difference is especially noticeable in hallways, living rooms, stairwells, and commercial spaces with strong side lighting. Before the first coat goes on, the wall needs to be sound, smooth, clean, dry, and properly primed.
Why Wall Surface Prep for Painters Matters
Painting is the final visual layer, not a repair material. Even premium paint has limits. It will not level a raised drywall joint, fill a deep dent, or stop a stain from bleeding through. It can also highlight texture changes between an old wall and a recent patch.
Surface preparation handles the issues that paint cannot. It creates a consistent texture, improves adhesion, and reduces the risk of flashing – those uneven dull or shiny areas that appear after paint dries. On a properly prepared wall, color looks more even, touch-ups blend better, and the finish holds up longer.
The level of preparation depends on the project. A rental turnover with minor scuffs may need basic patching and spot priming. A high-end renovation with large windows, dark paint, or smooth ceilings may require a Level 5 finish. Strong natural light and modern flat or satin paints are less forgiving, so they demand more precision before painting begins.
Start With a Close Inspection
The best prep work begins before sanding or applying compound. Walk the room and inspect walls from several angles. Turn on the room lights, then look along the surface rather than straight at it. Side lighting can reveal imperfections that are easy to miss otherwise.
Look for popped screws, nail holes, dents, cracking at joints, damaged corner bead, loose tape, water staining, and uneven previous repairs. Check around doors, windows, electrical boxes, vents, and baseboards, where movement and impact damage are common.
Not every crack has the same cause. A fine hairline crack may be a simple cosmetic issue. A recurring crack near a doorway or ceiling line can point to movement, poor original taping, or moisture. If the cause is not addressed, the repair may look good briefly and then return through the new paint.
Check for Moisture Before Repairing
Drywall compound and primer should only be applied to a dry, stable surface. Water stains, soft drywall, bubbling paint, or a musty smell can indicate an active leak or excess moisture. Repairing and painting over the evidence will not solve the problem.
Find and correct the moisture source first. Once the area is dry, damaged drywall may need to be cut out, replaced, taped, finished, and primed. This takes more time than a quick patch, but it prevents a failed finish and protects the surrounding wall.
Repair Damage the Right Way
Small nail holes and minor dents can often be filled with a quality patching compound. Larger holes, damaged seams, and broken drywall corners need a more complete repair. A durable repair is built in layers, with the correct materials and enough drying time between coats.
For drywall seams and patches, the goal is not simply to cover the damage. The repair needs to feather gradually into the surrounding wall so there is no visible edge after paint. That usually means applying joint compound beyond the damaged area, allowing it to dry, sanding it smooth, and applying additional coats as needed.
A common mistake is trying to complete a repair with one thick coat. Thick compound dries slowly, can shrink or crack, and is harder to sand evenly. Several thin coats create a flatter, cleaner result. The same principle applies to skim coating broad problem areas, old texture transitions, and walls with widespread surface damage.
Corner bead deserves special attention. A chipped outside corner can stand out from across the room after painting. Depending on the damage, it may need compound work, a corner repair patch, or replacement of the damaged bead section. A sharp, straight corner gives the room a more finished appearance.
Sand for Smoothness, Not Just Speed
Sanding is where many otherwise good repairs go wrong. Too little sanding leaves ridges and tool marks. Too much sanding can expose tape, damage drywall paper, or create a low spot that catches the light.
Use the right sanding approach for the surface. Fine-grit sanding is generally used between finish coats to remove minor imperfections. A sanding pole helps maintain consistency on larger walls and ceilings, while hand sanding gives better control around patches, corners, and trim. The goal is a smooth transition, not an aggressively sanded wall.
After sanding, inspect the repair with a work light or flashlight held at a low angle. This simple check reveals ridges, pinholes, and uneven edges before primer makes them more difficult to correct. Run a clean hand over the surface as well. Your hand will often find a raised edge that your eyes miss.
Dust must be removed before primer or paint. Wipe walls with a clean microfiber cloth, vacuum with a soft brush attachment, or use the cleaning method recommended for the paint system. Dust left on the wall can interfere with adhesion and leave a gritty finish.
Clean the Surface Before Primer
A wall may look clean and still have residue that affects paint. Kitchens can collect grease. Bathrooms can hold soap residue. Entryways, stairwells, and commercial corridors often have fingerprints, scuffs, and airborne grime. Old smoke residue or nicotine staining requires more than a quick dusting.
Wash affected surfaces with an appropriate cleaner, then allow them to dry fully. Avoid soaking drywall or leaving cleaner residue behind. Glossy surfaces may also need light scuff sanding so primer can bond properly.
This is one area where the right process depends on the wall. A newly finished drywall surface primarily needs dust removal and primer. An older painted wall may need cleaning, sanding, stain blocking, and repairs before it is ready. Skipping those steps can lead to peeling, uneven sheen, or stains that reappear through the finish coat.
Prime Repairs and New Drywall Properly
Primer is not optional when drywall compound, bare drywall paper, stains, or major repairs are involved. Joint compound is porous and absorbs paint differently than the surrounding painted wall. Without primer, patches can appear dull or different in sheen even when the paint color matches.
Spot priming small repairs may be enough for limited patchwork. For walls with many repairs, a full skim coat, significant color changes, or new drywall, priming the entire surface often produces the most uniform result. This helps paint absorb evenly and gives the painter a consistent base.
Use a stain-blocking primer when water marks, smoke damage, marker, tannins, or other stains are present. Standard wall primer may not prevent those stains from bleeding through. For difficult stains, more than one primer coat may be necessary.
For premium interiors, especially spaces with critical lighting, a Level 5 drywall finish may be the right choice. Level 5 includes a thin skim coat over the finished surface to minimize texture differences and joint visibility. It is not necessary for every project, but it is often worthwhile for smooth ceilings, dark colors, high-gloss paint, and walls exposed to strong daylight.
Protect the Details That Frame the Finish
Good preparation includes more than the center of the wall. Protect floors, trim, cabinetry, fixtures, and adjacent surfaces before work begins. Remove switch plates when possible, cover nearby finishes, and keep sanding dust contained.
Caulking is also part of a paint-ready finish when small gaps appear between trim and walls. Use paintable caulk where appropriate, apply it neatly, and allow it to cure as directed. Caulk can create a crisp transition, but it should not be used to hide wide gaps, failing drywall, or movement issues.
Before turning the room over to painting, make one final inspection. Check the walls in normal room lighting and with side lighting. Confirm that repairs are smooth, corners are straight, dust is gone, primer is dry, and the surface feels consistent from one area to the next.
When Professional Prep Makes Sense
Minor wall prep can be manageable for a small touch-up. Larger repairs, damaged ceilings, recurring cracks, extensive texture removal, and high-visibility finishes are different. These projects need the right materials, controlled sanding, and a trained eye for what paint will reveal.
TH Taping helps homeowners, contractors, and property managers across Niagara Region, St. Catharines, and Hamilton prepare drywall surfaces for a clean final coat. From small patches and emergency repairs to Level 4 and Level 5 finishing, the focus stays on precise workmanship and a wall that is truly ready for paint.
A painter can only work with the surface in front of them. Give them a clean, dry, properly repaired, and primed wall, and the final color gets the chance to look exactly as it should.






