
How Professionals Skim Coat Drywall Walls

Popcorn Ceiling Removal vs Skim Coating Compared
11 julio, 2026
What Is Level 5 Finish? Drywall Guide for Homes
15 julio, 2026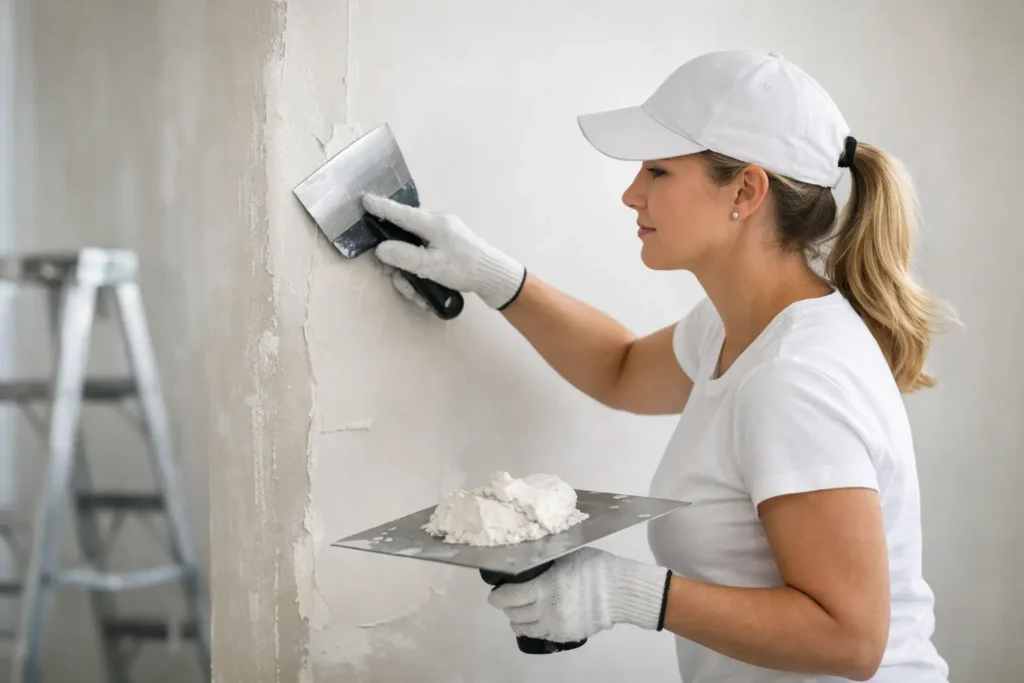
A wall can look acceptable until fresh paint hits it. Then old roller texture, patched areas, joint lines, dents, and uneven sheen become hard to ignore. When professionals drywall skim coat walls, the goal is not simply to add compound. It is to create one consistent surface that looks clean from every angle and holds up as the room is finished.
For homeowners, property managers, and contractors, skim coating is often the step that turns a repaired or outdated wall into a space ready for quality paint. It can also be the right solution after wallpaper removal, popcorn ceiling removal, water-damage repairs, or a renovation that leaves several patches across the same room.
What Skim Coating Actually Does
A skim coat is a thin, controlled layer of drywall compound applied across a wall or ceiling. Rather than filling one crack or covering one patch, it levels the broader surface. The finish is built through preparation, multiple thin coats where needed, careful sanding, and detailed inspection under proper lighting.
This is why a skim coat is different from a quick patch. A patch repairs a specific damaged area. Skim coating blends imperfections into the rest of the wall so the repair does not stand out after painting. It is especially valuable when a room has visible drywall seams, mismatched texture, ridges around repairs, or a surface that needs to transition from textured to smooth.
The best results do not come from applying a heavy coat and hoping sanding will fix it later. Too much material can crack, shrink, or create waves. Experienced finishers use thin coats and the right tools to keep the surface flat while building enough coverage to hide flaws.
When to Skim Coat Drywall Walls
Not every wall needs a full skim coat. If the drywall is in good condition and only has a few nail holes or minor dents, targeted repairs may be faster and more cost-effective. But a full skim coat becomes the better investment when the wall has widespread visual problems that paint alone will not hide.
It is commonly recommended after wallpaper has been removed. Even when the paper comes off cleanly, the adhesive, torn facing paper, and uneven areas underneath can leave a rough surface. Painting directly over it often leads to a disappointing finish. Skim coating creates a fresh, paint-ready base.
It is also useful after major drywall repairs. A new patch can be structurally solid but still catch the light differently from the surrounding wall. The same applies to old settlement cracks, repaired plumbing access holes, and sections opened during electrical work. Skim coating helps blend those areas into a consistent plane.
Textured walls and ceilings are another common reason. Some textures can be coated over successfully, while others need more preparation or removal first. Heavy texture may require several coats, and the condition of the existing surface matters. If loose paint, failing texture, or water damage is present, those issues should be addressed before any finishing compound is applied.
Why Paint Reveals Every Imperfection
Flat paint is forgiving compared with satin, eggshell, semi-gloss, or any finish with noticeable sheen. The more reflective the paint, the more it exposes seams, sanding scratches, ridges, and uneven areas. Strong natural light, recessed lighting, and wall-mounted fixtures can have the same effect.
That is why finish level should be considered before painting begins. A Level 4 finish is the standard choice for many painted interior walls. It includes taped joints, multiple coats of compound over fasteners and accessories, and sanding for a smooth appearance. For areas with critical lighting or premium paint finishes, a Level 5 finish may be the smarter choice. It adds a uniform skim coat across the entire surface to reduce visible texture and joint contrast.
The choice depends on the room, the lighting, the paint, and your expectations. A utility room may not require the same level of finish as a bright living room, lobby, high-end office, or newly remodeled kitchen. Spending appropriately on the surface preparation prevents the frustration of repainting a wall that still looks uneven.
The Professional Skim Coat Process
A clean result starts before compound is opened. The room needs to be assessed for loose material, moisture problems, damaged drywall, protruding fasteners, and failed tape. A skim coat can improve appearance, but it should not be used to conceal an active leak, soft drywall, or unstable surface.
Preparation includes protecting floors, fixtures, trim, and nearby furniture from dust and splatter. Existing repairs are secured, cracks are properly treated, and raised edges are removed. If the wall has glossy paint or residue, it may need cleaning and scuffing so the compound bonds correctly.
The compound is then applied in thin, even passes. Depending on the condition of the wall, one coat may be enough, but two or more are often needed to achieve a smooth, uniform result. Each coat must dry fully before the next stage. Rushing this process can lead to drag marks, weak adhesion, or visible shrinkage.
After drying, the surface is sanded with care. Sanding is not about aggressively removing compound. It is about refining the finish, knocking down minor high spots, and creating a consistent surface for primer. Professional dust control matters here, particularly in occupied homes and commercial spaces where cleanup and minimal disruption are priorities.
The final inspection should happen under real room lighting, not only from straight ahead. Side lighting is where flaws show up. A skilled finisher checks corners, seams, transitions, and broad wall areas from multiple angles before the space moves on to primer and paint.
Common Problems With DIY Skim Coating
Skim coating looks simple in short videos, but large walls quickly reveal inconsistencies. The most common issue is applying compound too thick. Thick material is harder to control, takes longer to dry, and often creates more sanding than expected. It can turn a small weekend project into days of dust and rework.
Another problem is trying to fix poor drywall taping with a superficial coat. If joints are loose, tape is bubbling, or fasteners are not properly covered, the underlying work needs repair first. A smooth top layer cannot make failing tape durable.
Many DIY attempts also stop too early. The wall may feel smooth to the hand but still show lap marks or shallow depressions after primer. Hands do not catch every flaw that light will reveal. This is where experience, proper tools, and inspection standards make a visible difference.
There is still a place for small homeowner touch-ups. Filling a few picture-hook holes or a minor ding can be manageable with patience. For complete rooms, ceilings, large repairs, or walls that will receive premium paint, professional finishing usually saves time and delivers a more dependable result.
Skim Coating Walls Before Painting
Once skim coating and sanding are complete, primer is the next essential step. Fresh drywall compound has a different porosity than painted drywall, so primer helps create an even base. Without it, paint can absorb unevenly and leave flashing, dull patches, or inconsistent sheen.
Use a quality primer suited to the wall condition and paint system. After it dries, inspect the surface again. Primer often reveals small imperfections that were difficult to spot on bare compound. Minor touch-ups at this stage are normal, especially on walls with strong lighting.
For the cleanest final result, do not let paint preparation become an afterthought. The finish of the wall determines how the paint will look, how it reflects light, and how polished the room feels. A beautiful color cannot compensate for visible drywall flaws beneath it.
A Smooth Finish That Holds Up
Whether you are preparing a home for sale, updating a rental unit, restoring walls after damage, or finishing a commercial renovation, skim coating can be the difference between walls that merely look repaired and walls that look new. It is a detail-driven service, and the quality is visible long after the work is done.
TH Taping helps homeowners, contractors, and property managers in Niagara Region, St. Catharines, and Hamilton achieve clean Level 4 and Level 5 finishes, from complete renovations to smaller urgent repairs. If your walls show texture, patchwork, seams, or old damage, a professional assessment can clarify whether skim coating is the right next step and give you a clear path to a finish you will be proud to paint.






