
A Popcorn Ceiling Makeover Case Study Done Right

How to Repair Drywall Cracks That Keep Coming Back
4 septiembre, 2026
Water Damage Repair Case Study: Ceiling Restored
8 septiembre, 2026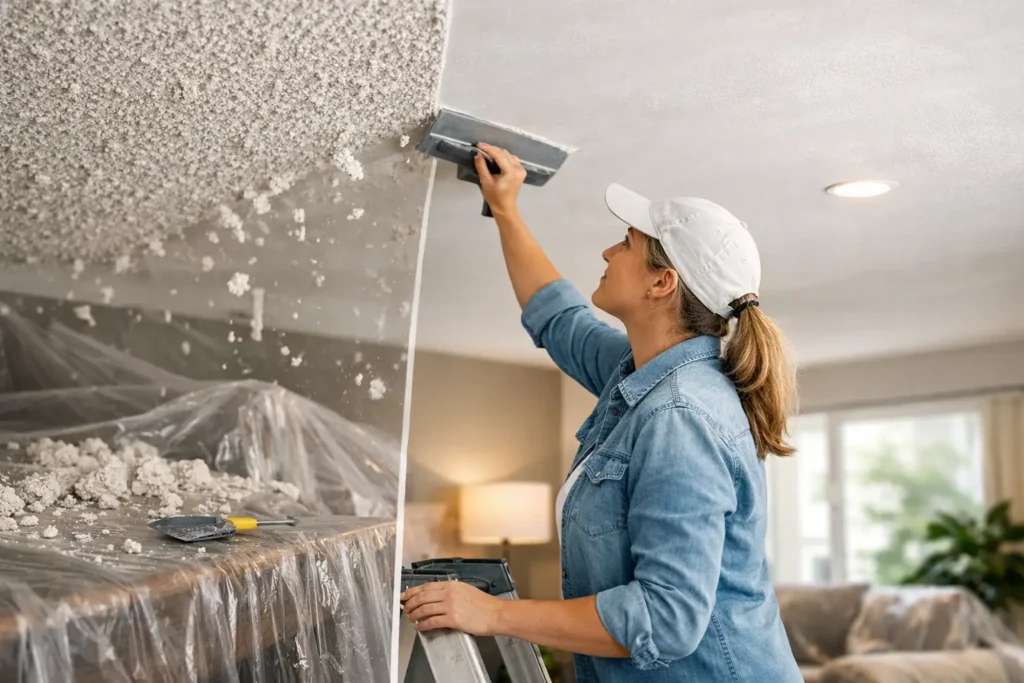
A popcorn ceiling can make an otherwise well-kept room feel older than it is. It catches shadows, holds dust, complicates repairs, and often distracts from new flooring, paint, or lighting. This popcorn ceiling makeover case study follows the practical process behind turning a heavily textured ceiling into a clean, smooth surface that feels current and is ready for a quality paint finish.
This is a representative renovation scenario based on the type of work homeowners and property managers commonly request. The goal was not simply to scrape away texture. The goal was to leave behind a ceiling that looked intentional, even, and professionally finished from every angle.
The Starting Point: A Ceiling That Pulled Down the Room
The project involved a living room and adjoining hallway with a traditional sprayed popcorn texture. The texture was uneven in places, with small cracks around a light fixture and previous patch attempts that were visible whenever daylight came across the ceiling.
The homeowner planned to repaint the room and update the lighting. Once the old fixture came down, the ceiling became the obvious issue. A new modern light would have made the heavy texture and repair marks stand out even more.
At first, the homeowner considered painting over the texture. That is sometimes a reasonable short-term option when the texture is intact, uniform, and the budget is limited. But paint does not hide a rough ceiling. It can darken the valleys in the texture, make patches more noticeable, and leave the room with the same dated appearance.
Removal and refinishing offered the better long-term result.
Before Any Removal: Safety and Surface Assessment
A popcorn ceiling should never be treated as a simple scraping job without first assessing the material. In older properties, textured ceiling products may require testing before they are disturbed. If there is any concern about hazardous material, proper testing and the appropriate abatement process come first.
Once the ceiling was cleared for work, the crew checked for the conditions that can affect the final finish: moisture staining, loose drywall tape, cracks, nail pops, sagging seams, and earlier repairs. This inspection matters because popcorn texture can hide imperfections that become very visible after the ceiling is smoothed.
In this case, the drywall itself was structurally sound. However, there were several areas that needed attention before finishing could begin. A hairline seam crack near the hallway opening, a shallow depression from an old repair, and minor damage around the electrical box all had to be corrected.
Popcorn Ceiling Makeover Case Study: The Work Process
The room was prepared first, not last. Floors, furniture, wall finishes, vents, and openings were protected to control dust and debris. Good preparation takes time, but it prevents avoidable cleanup and keeps the work focused on the ceiling rather than repairing damage around it.
The existing texture was then removed carefully in manageable sections. The right method depends on the texture, the condition of the drywall underneath, and the results of the material assessment. The objective is to remove the texture without gouging the drywall face paper or introducing unnecessary water into the ceiling.
After removal, the true condition of the ceiling was visible. This is the point where many DIY projects become frustrating. What looked like a flat surface under popcorn can reveal uneven joints, tape edges, patch outlines, and minor framing variations. Scraping gets rid of the texture. It does not create a smooth finish on its own.
The crew repaired the cracked seam and reinforced weak areas where needed. Damaged spots were patched, fasteners were addressed, and the ceiling was prepared for a full skim coat. Each repair was feathered beyond the immediate damaged area so it would disappear into the larger surface after sanding and painting.
Why a Skim Coat Made the Difference
A skim coat is a thin, controlled application of joint compound across the ceiling. Its job is to level minor imperfections and create a continuous surface, not to bury problems under excessive material.
For this project, the ceiling received multiple coats with drying time between applications. Each coat served a purpose. The first coat filled low areas and softened transitions. The following coat refined the surface and broadened the feathered edges around repairs and joints.
This is detailed work. Applying compound too heavily can lead to unnecessary sanding, shrinkage, or unevenness. Applying too little can leave visible lines when sunlight or recessed lighting hits the ceiling at an angle. The best finish comes from steady application, proper drying, and careful sanding between stages.
A Level 5 finish is often the right choice for ceilings with strong natural light, large windows, or new recessed lights. It provides an extra level of surface uniformity before painting. Not every room requires that standard, but it is worth discussing when the ceiling will be highly visible.
The Challenge: Light Exposes Everything
The biggest challenge in this makeover was not the texture removal. It was the lighting.
The living room had a large front window, and the new lighting plan included recessed fixtures near the ceiling perimeter. This created what finishers call critical light: light that travels across the surface and exposes ridges, joint lines, and shallow depressions.
A ceiling can look acceptable under one overhead fixture and still show flaws in morning sun or under recessed lights at night. That is why the surface was inspected from several angles before it was approved for primer. Any visible imperfection was corrected while the work area was still protected and accessible.
For homeowners planning a similar renovation, this is an important trade-off. A basic smooth finish may be suitable for a low-light bedroom or rental turnover. A premium finish requires more labor and time, but it pays off in open living spaces, entryways, kitchens, and rooms with directional lighting.
The Result: A Cleaner, Brighter Room
Once the ceiling was smooth, primed, and ready for paint, the room changed immediately. Without the textured surface breaking up the light, the ceiling appeared higher and the walls looked cleaner. The repaired areas no longer drew attention, and the updated light fixture became a feature instead of a spotlight on ceiling flaws.
The visual improvement was more than cosmetic. A smooth ceiling is easier to maintain, easier to repaint, and easier to repair if future work is needed. It also gives the homeowner more flexibility with lighting, wall color, and interior design choices.
The final result was not a ceiling that merely looked less textured. It was a continuous, refined surface with no obvious patch boundaries, no heavy shadowing, and no reminder of the old popcorn finish.
What This Project Shows About Popcorn Ceiling Removal
The main lesson from this popcorn ceiling makeover case study is that the removal stage is only one part of the job. The quality of the final result depends on the drywall repair, taping, skim coating, sanding, and inspection that follow.
A ceiling with minor damage may only need targeted repairs and a light skim coat. A ceiling with failing joints, water damage, or extensive unevenness may need more involved drywall work. The right scope should be based on what is actually behind the texture, not on a one-size-fits-all price or process.
For property managers, contractors, and homeowners in Niagara Region, St. Catharines, and Hamilton, working with a drywall finishing specialist helps keep the project organized from surface assessment through paint-ready completion. TH Taping approaches these upgrades with the same attention to detail used for repairs, full drywall finishing, and Level 4 or Level 5 surfaces.
A smooth ceiling does not need to be flashy to make a strong impact. When it is finished properly, it simply lets the rest of the room look its best.