
How to Fix Drywall Nail Pops That Keep Returning

Popcorn Ceiling Removal St Catharines Done Right
18 julio, 2026
Compare Level 4 and Level 5 Drywall Finishes
22 julio, 2026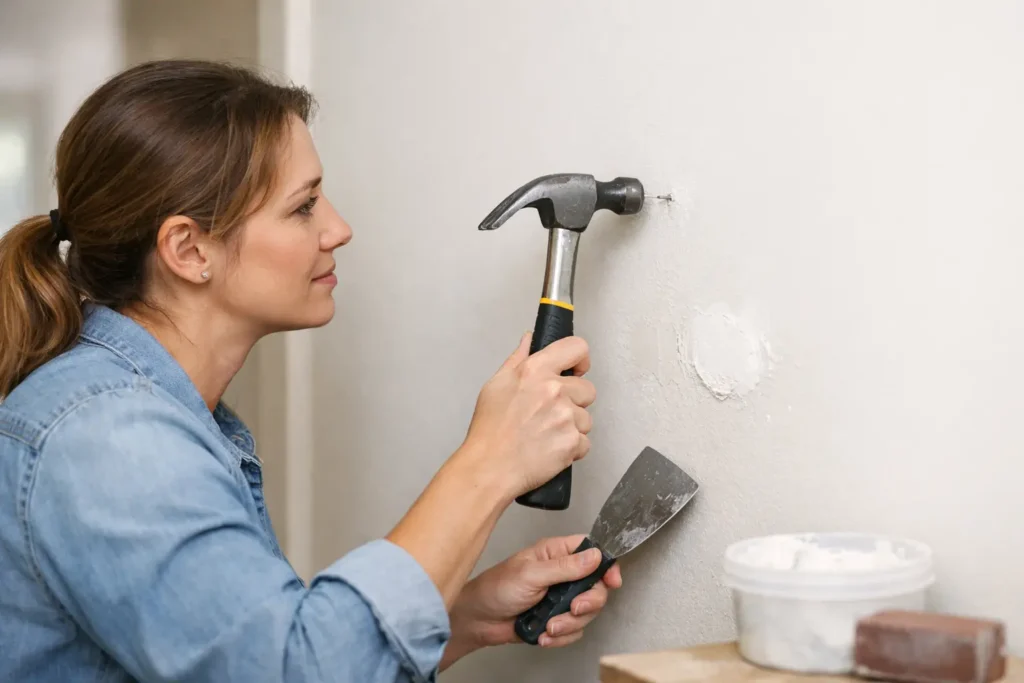
A small round bump in an otherwise smooth wall can catch the light, show through fresh paint, and make a room look unfinished. Knowing how to fix drywall nail pops correctly means more than pushing the bump back into place. The goal is to secure the drywall to the framing, repair the damaged surface, and create a finish that disappears once painted.
Nail pops are common in both newer homes and older properties. They can happen after seasonal framing movement, settling, humidity changes, or poor original fastening. Most isolated nail pops can be repaired with basic tools and careful finishing. If they keep returning or appear throughout a wall or ceiling, the issue may need a closer look.
What Causes Drywall Nail Pops?
A nail pop happens when a drywall nail gradually works its way outward from the wood framing behind the board. As the nail head pushes against the joint compound and paint, it creates a visible bump, crack, or small circular break in the wall surface.
Wood framing expands and contracts with changes in temperature and moisture. This movement is especially noticeable around exterior walls, ceilings, and areas affected by changing indoor humidity. A home can also settle over time, putting slight pressure on drywall panels and fasteners.
In some cases, the original nail was not driven into solid framing or the drywall was not secured with enough fasteners. Fasteners placed too close to a board edge, overdriven screws that broke the paper facing, or loose framing can all contribute to recurring pops. A single pop is usually a cosmetic repair. A line of pops along a stud or several pops in one area can point to a larger fastening or movement issue.
Tools and Materials You Will Need
For a clean repair, gather a hammer, drill or screw gun, drywall screws, joint compound, a 4- to 6-inch taping knife, a wider finishing knife, sanding sponge or fine-grit sandpaper, primer, and matching paint. A stud finder is useful if the framing location is not obvious.
Use drywall screws that are long enough to pass through the drywall and hold firmly in the framing. For standard 1/2-inch drywall over wood studs, 1 1/4-inch coarse-thread drywall screws are common. The right fastener depends on the thickness of the drywall and whether the framing is wood or metal, so confirm the material before starting.
A quality lightweight or all-purpose joint compound works well for small repairs. Setting-type compound can speed up the process, but it dries harder and requires more experience to sand smoothly.
How to Fix Drywall Nail Pops for a Lasting Repair
The repair itself is straightforward, but each step matters. Rushing the fastening or applying compound too heavily often creates a patch that remains visible after painting.
1. Check the area around the pop
Press lightly around the nail pop. If the drywall feels solid and the damage is limited to one small spot, it is usually a simple repair. If the board moves, flexes, or sounds hollow, locate the stud before adding screws.
Look for nearby cracks, other raised fasteners, stains, or soft drywall. Water damage, a roof or plumbing leak, and loose framing should be addressed before cosmetic work begins. Covering a moisture problem with compound only delays a more expensive repair.
2. Secure the drywall with screws
Do not rely on the existing nail alone. Drive drywall screws into the stud above and below the popped nail, typically about 1 to 2 inches away from it. This holds the drywall firmly against the framing and reduces the chance that the nail will work loose again.
Set each screw head just below the drywall surface without tearing the paper face. The screw should create a shallow dimple, not a deep crater. If you break the paper, remove the screw and install another one nearby in solid framing.
Once the drywall is secure, use a hammer and nail set to tap the raised nail slightly below the surface. If the nail will not stay recessed or the drywall face is badly damaged around it, carefully remove the nail instead. Avoid striking the wall aggressively, since that can crack the surrounding compound or loosen more fasteners.
3. Remove loose material and apply the first coat
Use the taping knife to scrape away loose paint, cracked compound, and raised paper around the repair. A clean, stable surface gives the new compound a better bond.
Apply a thin coat of joint compound over the recessed nail and new screw heads. Extend the compound a few inches beyond the repair and smooth the edges as much as possible. Thin coats dry more evenly, shrink less, and are easier to sand than one thick application.
Let the compound dry completely. Drying time depends on the product, room temperature, humidity, and thickness of the coat. A patch that feels dry on the surface may still be soft underneath, so give it enough time before sanding or recoating.
4. Build a wider, smoother finish
Lightly sand the first coat to remove ridges and high spots. Do not sand aggressively enough to expose the drywall paper or metal screw heads.
Apply a second coat using a wider knife, feathering the compound farther out from the center. The wider finish helps the repair blend into the wall plane instead of looking like a small raised circle under paint. For walls with a smooth, highly visible finish, a third thin coat often produces the best result.
After the final coat dries, sand with fine-grit sandpaper or a sanding sponge until the patch feels smooth to the touch. Run your hand across the area and look along the wall with a work light held at an angle. Side lighting reveals ridges, shallow dents, and uneven edges that overhead lighting can hide.
5. Prime before painting
Primer is a small step that makes a big difference. Fresh joint compound absorbs paint differently than the existing painted wall, and unprimed patches can show as dull or shiny spots even when the color matches.
Apply primer to the repaired area, let it dry, then paint. If the wall color is older or faded, painting the entire wall from corner to corner may provide a more uniform result than touching up one small section.
Common Mistakes That Make Nail Pops Return
The most common mistake is simply hammering the nail back in and covering it with compound. That may look fine briefly, but it does not address the movement that pushed the nail outward in the first place. Adding properly set screws into solid framing is what makes the repair more durable.
Another issue is overdriving screws. When a screw head tears through the drywall paper, it loses much of its holding strength. The screw may look recessed, but it is no longer securing the board properly.
Heavy joint compound is also a frequent problem. Thick patches crack, take longer to dry, and require aggressive sanding. Several thin, feathered coats create a flatter result with less effort.
Finally, do not skip primer. A wall can feel perfectly smooth and still show a noticeable patch after paint if the surface was not sealed first.
When Nail Pops Need Professional Repair
A few isolated pops are manageable for many homeowners. Repeated pops, long cracks, sagging drywall, or widespread fastener issues deserve professional attention. The same applies when the damage is on a ceiling, near a stairwell, above a high wall, or in an area where matching a smooth finish will be difficult.
Ceiling nail pops can be more complicated because gravity, truss movement, and framing conditions all affect the repair. Cracks at wall-to-ceiling joints may also be related to truss uplift rather than a loose nail. In that situation, fastening and finishing methods need to account for seasonal movement instead of locking the drywall in the wrong place.
For property managers, contractors, and homeowners preparing for paint or resale, visible drywall patches can affect the overall impression of a room. A professional drywall finisher can assess the cause, reinforce the affected area, and feather the repair to match the surrounding texture and finish level.
TH Taping helps homeowners and commercial clients in Niagara Region, St. Catharines, and Hamilton with minor drywall repairs as well as complete taping and finishing work. When the wall needs more than a quick patch, a clean repair protects the appearance of the entire space.
A nail pop may be small, but the best repair is one you do not notice after the paint dries. Secure the drywall first, take time with thin finish coats, and treat recurring damage as a signal to inspect what is happening behind the surface.






