
Water Damaged Drywall Repair Done Right

Ceiling Crack Repair: Fix or Refinish?
18 mayo, 2026
Smooth Ceiling Finish: Is It Worth It?
20 mayo, 2026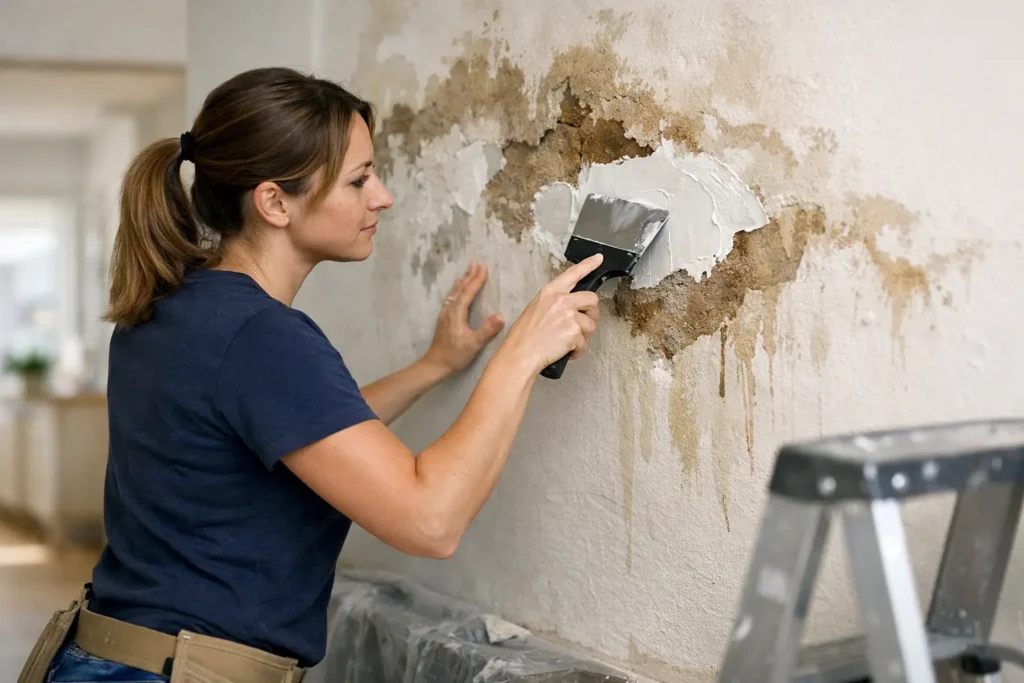
A brown ceiling stain rarely stays just a stain for long. Once moisture gets into drywall, the real question is not only how bad it looks, but how far the damage has spread behind the surface. Water damaged drywall repair works best when the source is handled first, the damaged area is opened up properly, and the finish is rebuilt to match the rest of the room.
For homeowners, property managers, and contractors, that matters because drywall damage is rarely just cosmetic. A soft wall section, bubbling tape joint, or sagging ceiling can quickly turn into a larger repair if it is patched too early or covered without checking what is happening underneath.
What water does to drywall
Drywall is strong when it stays dry and stable. Once it absorbs water, the gypsum core softens, paper facing separates, fasteners can loosen, and joints begin to fail. In light cases, you might only see a stain or a little swelling. In heavier cases, the board loses structure and needs to be removed.
Ceilings are especially sensitive. Even a small roof leak or plumbing issue above can leave drywall sagging, cracked, or unsafe. Walls can be more forgiving, but only if the moisture exposure was brief and the material dried before the core broke down.
That is why the first step is always diagnosis. If the leak is still active, repairing the drywall before fixing the cause only gives you a cleaner-looking problem for a short time.
Water damaged drywall repair starts with the source
Before any patching, taping, or finishing begins, the moisture source has to be corrected. That could mean a plumbing leak, roof penetration, window issue, appliance overflow, or condensation problem. If the area is repaired while hidden moisture remains, the new finish can blister, stain, or fail again.
This is also the stage where a careful inspection matters. Sometimes the visible stain is smaller than the actual wet area. Water travels. It can move along framing, spread across the back of the drywall, and show up several feet from the original entry point.
A good repair approach treats the visible damage and the likely hidden damage as two different things. If you only address what the eye sees, you risk missing the part that causes repeat issues.
When drywall can be saved and when it should be replaced
Not every water event means full replacement. If the drywall got lightly wet, dried quickly, and has not softened or deformed, it may be salvageable. A stain on otherwise firm board can sometimes be sealed and refinished after the area is fully dry.
But there are clear signs that replacement is the better call. If the drywall feels mushy, crumbles under pressure, bulges, sags, or the tape joints have let go, patching over it is not the right fix. The same goes for ceiling sections that have dropped or walls that have swollen at the base.
There is also a time factor. Clean water from a fresh plumbing issue is one situation. Long-term moisture, repeated leaks, or dirty water exposure is another. The longer drywall stays wet, the less reliable it becomes. In those cases, cutting out damaged sections is usually the safer and cleaner solution.
The right way to open and remove damaged drywall
Clean removal makes the finish stage much easier. Damaged drywall should be cut back to solid, dry material with stable edges. That often means squaring up the opening rather than trying to preserve every inch of compromised board.
On ceilings, this step needs extra care. Wet drywall overhead can lose strength fast, and partial failure creates both safety and finish problems. Removing only the stained center while leaving softened perimeter material can lead to cracking around the patch later.
Insulation and framing should also be checked once the board is open. If the cavity is still damp, the repair pauses there. Drywall finishing should never start until the substrate is truly dry.
Matching the patch is only half the job
Many drywall repairs fail visually, not structurally. The patch is solid, but the room still looks patched. That usually comes down to poor blending at the joints, uneven buildup, bad sanding, or texture mismatch.
A proper water damaged drywall repair is not just about filling the hole. It is about restoring a flat, clean surface that disappears after primer and paint. That is where taping and finishing skill matters. Joint placement, feather width, compound control, and sanding discipline all affect whether the repair blends in or keeps catching your eye every time light hits the wall.
Ceilings are less forgiving than walls because side lighting exposes every ripple. Smooth ceiling repairs need careful buildup and finishing, especially in open areas or larger rooms where the patch sits in direct view.
Why small patches sometimes turn into larger finish areas
This is one of the most common surprises for property owners. The damaged section may only be one or two square feet, but the finish area can extend much wider. That is normal.
Drywall finishing needs room to taper. If the repair is kept too tight, the patched area leaves a hump around the edges. A wider feather creates a flatter result. In premium spaces, or anywhere a level 4 or level 5 style finish is expected, the blend often needs more surface area than people first assume.
That does not mean every repair becomes a full-wall skim. It depends on lighting, existing wall condition, texture, paint sheen, and location. A utility room allows more forgiveness than a front hallway, office, or living room with smooth painted surfaces.
Common mistakes that make repairs fail
The fastest repair is not always the least expensive one once you factor in rework. One common mistake is sealing a stain and painting over it before checking if the board is soft. Another is installing a patch into an area that still has moisture in the framing or insulation.
A different problem is poor edge prep. Loose paper, damaged corners, and weak surrounding drywall create a patch that looks acceptable for a week and then starts cracking at the joints. Rushed sanding also causes trouble. It may feel finished until the primer goes on and every line becomes visible.
Texture mismatch is another issue. If the surrounding ceiling or wall has a subtle hand texture, orange peel, or a previously skimmed finish, the repair has to respect that existing surface. A smooth patch in a lightly textured field stands out just as much as a rough patch in a smooth room.
When to call a pro for water damaged drywall repair
If the damage is overhead, widespread, recurring, or in a visible finished space, professional repair is usually the better route. The same applies when the drywall needs to match a smooth ceiling, a level 4 wall, or a premium paint-ready finish.
For contractors and property managers, speed also matters. A professional crew can remove damaged sections cleanly, rebuild the surface correctly, and keep the repair moving without the delays that often come from trial and error. That is especially useful after leak repairs, unit turnovers, renovation punch lists, or emergency interior damage.
In service areas like Niagara, St. Catharines, and Hamilton, fast response can make a real difference when a leak affects occupied homes, rental units, or commercial interiors. Waiting too long usually increases the repair scope.
What a quality finished repair should look like
A good repair should feel solid, look flat, and disappear into the surrounding surface under normal room lighting. Seams should not telegraph through paint. Corners should be crisp. Ceiling patches should not leave shadow rings or broad low spots around the repair.
Just as important, the fix should hold. That comes from dry substrate, sound backing, proper taping, controlled compound work, and a finish level that fits the room. Precision at each step is what turns a repaired area into a finished surface instead of a visible patch.
When water damage hits drywall, the goal is not simply to close the opening. It is to bring the wall or ceiling back to a clean, durable condition that looks right and stays right. If the repair is handled with care from demo to final finish, the damage becomes a solved problem instead of a recurring one.






