
Popcorn Ceiling Removal Guide for Clean Results

When Do You Need Level 5 Drywall?
6 junio, 2026
Niagara Drywall Service for Basements
10 junio, 2026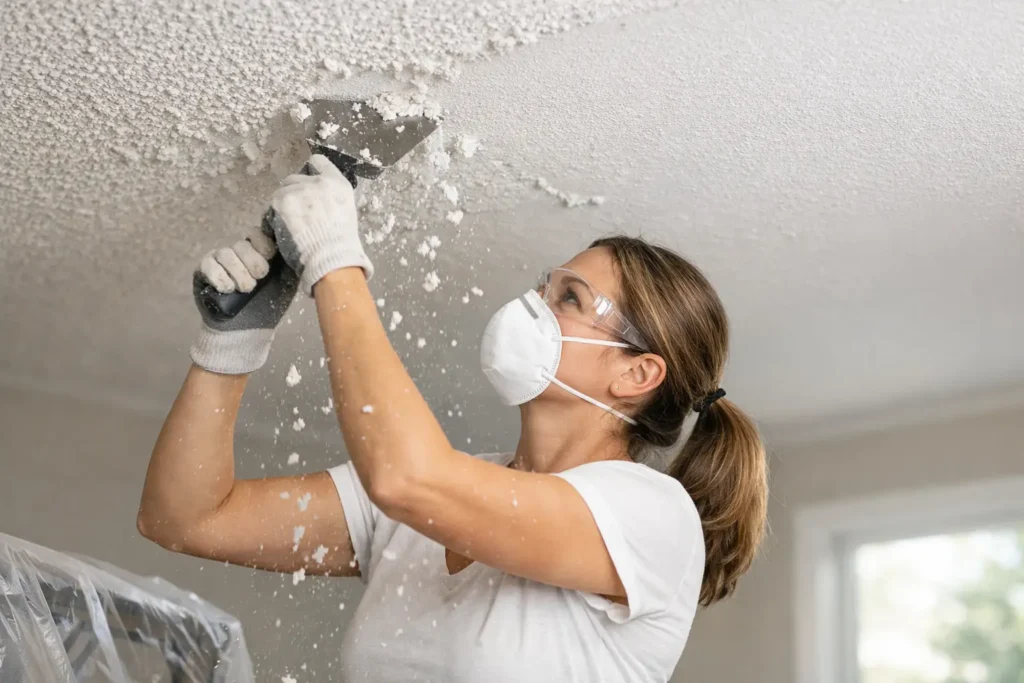
That old textured ceiling usually looks harmless until you start planning a repaint, listing your home, or upgrading a room. Then it becomes the one surface that makes everything feel dated. This popcorn ceiling removal guide is built for homeowners, property managers, and contractors who want a cleaner finish and fewer surprises before the work begins.
When popcorn ceiling removal makes sense
Popcorn texture was common for years because it helped hide minor ceiling flaws and speed up finishing. The problem is that it collects dust, can stain easily, and often makes a room feel darker and older than it is. If your goal is a brighter, smoother interior, removing it can make a noticeable difference.
That said, removal is not always the automatic answer. If the ceiling contains asbestos, is badly damaged, or has been painted several times, the job changes fast. In some cases, covering the texture with new drywall or skim coating over a stable surface may be the better route. The right choice depends on the age of the ceiling, its condition, and the finish you want at the end.
Popcorn ceiling removal guide: start with testing and inspection
Before any scraping starts, confirm what you are dealing with. If the home was built before the mid-1980s, asbestos testing is the first step. That is not optional. Dry scraping a contaminated ceiling can create a serious health risk and turn a simple improvement project into a hazardous cleanup.
You also want to inspect for water stains, sagging drywall, cracked joints, or previous patchwork. Popcorn texture often hides more than texture. It can conceal uneven seams, old repairs, and framing movement. Once the texture is gone, those issues become visible, so it helps to expect some ceiling repair and re-finishing as part of the process.
If the texture has been painted, removal gets harder. Unpainted popcorn usually softens with water and scrapes off more easily. Painted texture often resists moisture and may require more aggressive work, patching, or complete resurfacing. That difference affects labor time, mess, and final cost.
How to prepare the room the right way
Good prep is what keeps this job from becoming a cleanup headache. Ceiling removal is dusty, wet, and messy even when done carefully. The more you protect upfront, the better the result and the faster the finish work goes.
Start by clearing out as much furniture as possible. What stays should be fully covered. Floors need heavy plastic or rosin paper, and walls should be protected if you are trying to avoid repainting the entire room. Remove ceiling fixtures, cover electrical boxes, and shut off power where needed.
HVAC vents should be sealed so dust does not travel through the property. In occupied homes, that matters even more. For rental units, commercial spaces, and staged homes, containment can make the difference between a manageable project and a disruption that spreads beyond one room.
The actual removal process
In a basic popcorn ceiling removal guide, the scraping step gets most of the attention, but technique matters more than force. The standard process is to lightly mist the ceiling in small sections, allow the texture to soften, and then scrape it off with a wide ceiling scraper. You do not want to soak the drywall. Too much water can damage the paper face, loosen tape, and create more repair work than necessary.
Working in sections helps keep moisture controlled and the surface consistent. A careful hand removes the texture while preserving the drywall underneath. If the ceiling gouges easily, the angle is too steep or the surface is too wet. If the material does not release, it may be painted or need more dwell time.
This is where many DIY jobs go sideways. People expect the texture to come off cleanly, but ceilings rarely cooperate that way. Some sections scrape well while others tear, peel, or expose old patching. A ceiling that looked fine with texture can suddenly need joint compound, sanding, and skim coating before it is ready for paint.
What happens after the popcorn is gone
Removal is only the first half of the job. A smooth ceiling depends on what happens next. Once the texture is off, the surface usually needs repairs, seam touch-ups, and a new finish coat to even everything out.
Minor imperfections can sometimes be corrected with targeted patching. More often, especially in older ceilings, a skim coat is the better move. It creates a more uniform plane and helps hide the small scratches, shallow gouges, and uneven porosity left behind after scraping. If you want that clean, modern look, this stage matters just as much as the removal itself.
After repairs, the ceiling needs proper sanding and priming. Primer seals the surface and helps the final paint lay down evenly. Skipping that step can leave flashing, patch marks, or visible texture differences under certain lighting. Flat ceiling paint is usually the best choice because it minimizes glare and hides small surface variation better than a sheen finish.
Popcorn ceiling removal guide: know the trade-offs
A smooth ceiling looks better, but it is less forgiving than heavy texture. That means the finish work has to be better too. If the room gets a lot of natural light or has recessed lighting, flaws become more visible. In higher-end spaces, many clients choose a level 4 or level 5 type finish approach because light reveals everything overhead.
There is also the question of cost versus value. If you are updating one main living area before selling, the visual payoff can be strong. If you are dealing with multiple units or a large commercial area, the scope can expand quickly. In those cases, it helps to decide whether every ceiling needs full removal or whether some spaces are better handled with repairs and a fresh finish.
Time is another factor. A small room may move quickly, but a whole-house project often involves removal, drying time, patching, sanding, priming, and painting. If you need the space back on a tight schedule, plan around the full process, not just the scraping day.
DIY or hire a pro?
If the ceiling is asbestos-free, unpainted, and limited to a small room, some homeowners take it on themselves. That can work if you are comfortable with overhead labor, heavy masking, and finish repairs. The challenge is that removal is physically tiring, and the final appearance depends on your drywall finishing skills more than your scraping skills.
Hiring a pro makes more sense when the ceiling is painted, damaged, extensive, or part of a bigger renovation. The value is not just speed. It is in cleaner containment, better surface repair, and a final finish that does not look patched together. For property managers and contractors, that consistency matters. One uneven ceiling can pull down the look of the whole room.
For homes and projects in areas like Niagara, St. Catharines, and Hamilton, professional help can also simplify scheduling when removal needs to coordinate with painters, electricians, or other trades. That keeps the project moving instead of turning the ceiling into the step that delays everything else.
Common mistakes to avoid
The biggest mistake is treating popcorn removal like a one-step cosmetic job. It is a ceiling refinishing job, not just a scraping job. If you budget only for removal and ignore repair and finishing, expectations usually fall short.
Another common problem is poor moisture control. Too much water damages drywall. Too little leaves the texture stubborn and difficult to remove. Inconsistent scraping pressure can scar the surface, and weak floor protection turns cleanup into its own project.
The last mistake is chasing a smooth ceiling without accepting the need for proper finish work. Once texture is removed, every seam, patch, and wave has a chance to show. A clean result comes from preparation, repair, and finishing working together.
If you are planning this update, start with a realistic inspection and choose the method that matches the ceiling you actually have, not the one you hope is hiding underneath. A smooth ceiling can completely change the feel of a room, but the best results come from doing the messy parts carefully and the finishing work even better.






