
How to Remove Popcorn Ceiling Safely

Popcorn Ceiling Removal Cost Explained
13 mayo, 2026
Drywall Patch Repair Done Right
15 mayo, 2026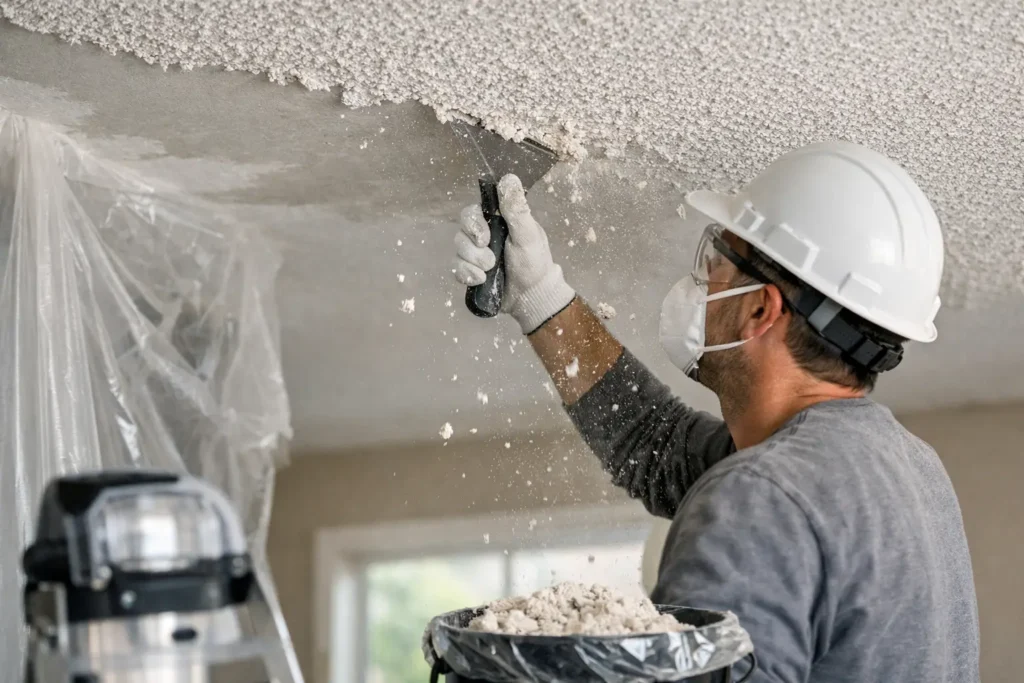
That rough, dated ceiling texture can make an otherwise clean room feel older than it is. If you are searching for how to remove popcorn ceiling, the first thing to know is this: the job is very doable in some homes, but it can also turn into a messy repair project fast if the ceiling has asbestos, poor adhesion, or hidden damage underneath.
For homeowners, property managers, and contractors, the smartest approach is to treat popcorn ceiling removal as both a demolition job and a finishing job. Scraping the texture off is only half the work. Getting the ceiling flat, smooth, and ready for primer and paint is what actually changes the room.
How to remove popcorn ceiling without creating bigger problems
Before you touch a scraper, figure out what is on the ceiling and when it was installed. If the texture was applied before the late 1980s, asbestos testing is not optional. Disturbing an asbestos-containing ceiling can release hazardous fibers into the air, and that is not a DIY risk worth taking.
Even when asbestos is not a factor, popcorn ceilings vary a lot. Some soften easily with water and scrape off in wide sheets. Others were painted over, which makes removal slower and rougher. In some homes, the ceiling underneath was never finished to a smooth standard because the texture was meant to hide joints, patches, and uneven drywall work.
That is why the answer to how to remove popcorn ceiling depends on the condition of the surface. If the goal is a true smooth ceiling, be prepared for skim coating, sanding, priming, and touch-up work after scraping.
Start with testing and prep
The cleanest jobs begin with good prep, not with aggressive scraping. Have a small sample tested if there is any chance the material contains asbestos. If the result is positive, stop there and use a qualified abatement professional.
If the ceiling is safe to remove, clear the room as much as possible. Take down light fixtures if practical, shut off power where needed, and cover the floors and walls well. Plastic sheeting helps, but heavy drop cloths on the floor matter just as much because wet texture gets heavy fast. Remove vents or cover them tightly so dust and debris do not travel through the system.
You will also want the right tools on hand. Most projects call for a pump sprayer, a wide drywall knife or ceiling scraper, a mud pan, joint compound, sanding tools, primer, and protective gear. Eye protection and a proper mask are basic, not optional.
Wet scraping is usually the best method
For unpainted popcorn texture, wet scraping is the standard approach because it reduces dust and helps the material release more easily. Spray a small test area with warm water and give it time to soak in. Not too much water, though. If the drywall gets saturated, you can damage the paper face and create more repair work than necessary.
A good test patch tells you a lot. If the texture softens and comes off with light pressure, the project is moving in the right direction. If it barely budges, the ceiling may have been painted, sealed, or applied heavily enough that scraping becomes more labor intensive.
Work in small sections rather than soaking the entire ceiling at once. Hold the scraper at a shallow angle and let the blade do the work. Gouging the drywall is one of the most common mistakes. Once the ceiling is scraped, let it dry fully before deciding what finishing work is needed.
What if the popcorn ceiling was painted?
This is where many DIY plans hit a wall. Painted popcorn does not absorb water the same way untreated texture does, so the easy-scrape method often stops working. You may need to score the surface lightly, use more controlled moisture, or switch strategies entirely.
Sometimes the better move is not full removal by scraping. If the texture is stable and asbestos-free, a contractor may recommend covering the ceiling with new drywall or using a skim coat system, depending on height, condition, and budget. That can save time, reduce damage, and create a cleaner final result in rooms where the existing ceiling is uneven or patchy.
This is one of those cases where cheaper at the start does not always mean cheaper at the end. Fighting a painted popcorn ceiling for days and then paying for ceiling repairs anyway is rarely the best value.
The finish work is what people notice
Once the texture is off, most ceilings still need repair. Expect visible seams, torn drywall paper, old patches, nail pops, or uneven areas that were hidden by the popcorn finish. If you want a modern flat look, this stage matters more than the scraping itself.
Joint compound is usually applied in thin coats to smooth the surface. Depending on the ceiling, one coat may not be enough. A better finish often takes multiple passes, with drying and sanding between coats. For spaces with strong natural light or a more premium paint finish, a higher level of smoothness may be worth the added labor.
This is why professional drywall finishers often approach popcorn removal as a complete ceiling restoration, not just a texture removal service. A ceiling can be technically stripped and still look poor if the substrate was never corrected.
Common mistakes that make the job harder
The first is skipping asbestos testing. The second is underestimating the mess. Popcorn ceiling removal can spread wet debris, dust, and compound through the room quickly if prep is rushed.
Another frequent issue is oversaturating the ceiling. Too much water can soften the drywall paper and lead to bubbling, peeling, or surface failure. On the other hand, not using enough water can force you to scrape too aggressively and gouge the ceiling.
A lot of people also stop too early on the finishing side. They scrape the texture, patch a few spots, and paint right away. Under fresh paint, every seam and ridge becomes more visible, especially with flat overhead lighting. If the room is being remodeled for resale, tenant turnover, or a higher-end finish, that shortcut usually shows.
When hiring a pro is the better decision
If the ceiling tests positive for asbestos, hire a specialist. If the ceiling is painted, badly damaged, or part of a larger renovation, hiring a pro often saves time and produces a better result. The same goes for commercial spaces, occupied rental units, and jobs with tight schedules.
A professional crew does more than remove texture. They control the mess, protect adjacent surfaces, repair the drywall properly, and leave the ceiling ready for primer and paint. That matters if you want the room to look truly updated instead of just scraped down.
For property owners in areas like Niagara, St. Catharines, and Hamilton, fast response can matter just as much as craftsmanship, especially when ceiling damage, tenant turnover, or renovation timelines are involved. TH Taping handles both the removal and the finish work, which helps keep the project moving without bouncing between trades.
Is it worth removing popcorn ceiling?
In many cases, yes. Popcorn ceilings can trap dust, date the room visually, and make newer finishes look out of place. Removing them usually improves the look of the home right away, especially when paired with a smooth ceiling finish and fresh paint.
That said, the value depends on the condition of the ceiling, the age of the material, and your expectations. If you just want the texture gone in a spare room, a basic approach may be enough. If you want a crisp, clean ceiling that matches updated walls and trim, the finish standard needs to be higher.
The real question is not only how to remove popcorn ceiling. It is how smooth, clean, and durable you want that ceiling to be when the work is done. If you start with that end result in mind, the right path becomes a lot easier to choose.






